Mrs. Regueiro's Plate: Cookies
Showing posts with label Cookies. Show all posts

Friday, October 4, 2013

Honey Cookie Butter Cookies


It's my absolute favorite time of the year! This past week in SoCal has been refreshingly cooler, and I might have dressed Elena and Emilio in warmer clothes maybe more than once this past week. I have some cute warm outfits that I want them to wear before they outgrow them. Although this weekend may be another hot one - I'm crossing my fingers hoping that Fall weather is here to stay for the rest of the season. I have already started working on my October bucket list and this hot weather spells disaster for everything on it. Pretty, pretty please with a big fat pumpkin on top - Fall weather, please come back and don't leave us.

On my October bucket list, I wanted to bake cookies...like lots of them. I have been pinning Pumpkin recipes like crazy but enjoying my Pumpkin M&Ms for the meanwhile. This summer kept me busy with ice cream and s'mores and other sweet treats, but I have been itching to bake cookies. I had originally wanted to make peanut butter cookies but I had less than a cup of peanut butter left. On the bright side I had an unopened jar of cookie butter that was screaming at me "USE ME" instead.

Friday, August 2, 2013

Best-Ever Chewy Chocolate Chip Cookie

Oh geez did July just disappear on me? How the heck did that happen?  I have been really enjoying time at home with my two little ones. Some days are really easy with them, Emilio will eat, sleep, poop and repeat this routine several times throughout the day. Elena on the other hand, she will eat, play, eat, poop, sleep, play, play, eat, and sleep. Then some days are hard because it's just a tad different routine with her, but I have been managing to spend quality one on one time with her when Emilio is down for his nap. 

The other day I managed to rock both of the kids to sleep at the same time for their afternoon naps, and I totally felt like supermom. I really wanted to take a nap as well and cuddle with both of my babies at the same time. Yet, I felt the sweet urge to bake something scrumptious and baked a batch of my freezer stash of the best chewy chocolate chip cookies ever. I'm totally guilty of not sharing this recipe for awhile now because they disappear fast and don't last enough for me to take a food photo. They are that GOOD.

Wednesday, February 6, 2013

Red Velvet Crinkle Cookies

Valentine's Day is right around the corner and it's not a typical holiday that Eric and I usually celebrate. We don't need a day to tell each other that we love each other, when we do that every day of the year. ;-) Plus, we are too busy celebrating my birthday which is in a couple of days. I already got a sweet early birthday gift of a much needed pre-natal massage. It was absolutely perfect and what made it even more perfect, the masseuse came to my house for the appointment. LOVE!

Friday, December 21, 2012

Peppermint Snickerdoodles for Sandy Hook

Last Friday's events in Newtown, Connecticut had hit a hard knot in my stomach and broke my heart into millions of pieces. Being a new parent, I was deeply saddened by the news and held my sweet daughter a little bit tighter ever since then. Plus, I have been super emotional with this second pregnancy and any little thing can trigger a river of tears from me, too. As a mother you know that every moment that you spend with your child is absolutely precious, and I can't fathom having to say goodbye to my children before I pass. No parent should ever have to go through this.

I send out my deepest condolences to all those affected by the tragedy and dedicate this cookie post as a tribute to the victims, families and the community of Newtown, Connecticut. It's hard to understand how such a tragedy could ever occur to those sweet innocent children and brave teachers.
Want to do something for the Newtown Community? You can donate to Newtown Youth and Family Services. According to their website, Newtown Youth and Family Services, Inc. is a "licensed, non-profit, mental health clinic and youth services bureau dedicated to helping children and families achieve their highest potential. NYFS provides programs, services, activities, counseling, support groups and education throughout the Greater Newtown area." All donations made to them are going to go back to those affected by the tragedy at Sandy Hook. Make a donation to their website here.

My heart and thoughts and prayers continue to be with the community of Newtown, Connecticut. We will all move forward, but we will not forget.
Peppermint Snickerdoodles
Adapted from Stick A Fork In It
ZipList Add Recipe
{Printable Recipe}

Friday, November 2, 2012

Salted Chocolate Chip Toffee Cookies

Wow, November is finally here. There are 53 days left until Christmas is here. OMG. Plus, you can officially appreciate the holiday decorations at all the stores and start cranking those holiday tunes. Or most likely you can start planning your Thanksgiving menu and start dreaming about all those holiday carbs. I'm a complete sucker for the holiday feasting and the countless holiday get-togethers there will be. I can't wait to put Elena in some cute Christmas onesies that I got last year, let's cross our fingers and hope they will fit.

I baked up these sweet treats while the SoCal weather had cooled down for us. It's a classic chocolate chip cookie amped up with espresso, toffee bits and a touch of sea salt. These soft and chewy cookies are the perfect way to help with your holiday planning madness. The SoCal weather may peak up in the high 80s this weekend because of the cranky Santa Ana winds, so make sure you plan ahead and bake these early in the morning. You can tease your loved ones with the sweet smell of cookies baking away in the kitchen.

Have a great weekend, and bake some cookies!

Salted Chocolate Chip Toffee Cookies
Adapted from The Baker Chick & Baking Illustrated
ZipList Add Recipe

Friday, September 28, 2012

Piña Colada-Oatmeal Cookies

Happy Friday and last Friday of September!

I can almost smell the crisp Fall and pumpkin-y scents of October, and already dreaming of all the Fall comfort foods that I want to make. Pumpkin breadboeuf bourguignon , Pink Parsley's baked potato soup, and Macaroni and Cheesecake's Apple Pie Muffins to name a few on my list. However, I am crossing my fingers that this next heatwave will be the LAST! This weekend we are facing 100 degree temperatures, and I will be avoiding any cooking attempts with my oven. 


So what do you do before the yuckiest heatwave of SoCal? You take plenty of morning/afternoon/evening walks, enjoy the cool weather, keep the entire house open and keep the air conditioning off before your electricity bill skyrockets into the triple digits. And more importantly, you BAKE it up with plenty of sweet treats to keep you satisfied until the heatwave is gone. These scrumptious Piña Colada-Oatmeal Cookies are like a taste of summer in cookie form. They taste exactly as their name and I added some dried cherries for that extra tarty kick. 


A sweet summery cookie!

Piña Colada-Oatmeal Cookies
Adapted from My Baking Heart 
ZipList Add Recipe
{Printable Recipe}

Tuesday, September 11, 2012

DIY Nestle Toll House Birthday Sugar Cookie Bouquets

Birthdays are little reminders to enjoy something sweet and simple. I saw an episode on the RHBH where one of the housewives threw an over-the-top lavish birthday party. The crazy mad tea party was like a bad episode of Bridezilla combined with My Super Sweet 16. I do not think I will ever reach that crazy birthday madness status because I could never afford a birthday party like that. Maybe in my wildest dreams, but coming back to reality and my SAHM wallet, just the simple act of birthday love and appreciation is the best gift you share with someone.
Buying gifts for birthdays are never my favorite task to deal with either. You never know what kids like most days because there are plenty of characters that they love from tv: Dora the Explorer, Sponge Bob, Blues Clues, Caillou, and Sesame Street to just name a few. I have 6 (soon to be 7) nieces and nephews all ranging from ages 1 to 7 and sometimes it's next to impossible to please them with the correct character. These kids are always changing their minds!

Funny story, my nephews are so technological advanced that when I would call them they would ask to "Facetime" with me. At the time, I didn't have an Iphone as I do now. Try explaining to a 4 year old and 5 year old that my phone didn't have that "Facetime" feature was like speaking a foreign language. I was simply told "well, I only want to Facetime to talk to you, so bye!" Tough cookies for me.
So what speaks the most to kids. Cookies do. Cute birthday decorated sugar cookies make them go weak in the knees. Cookies on sticks are the best thing ever because they make the kids happy. The moment my nieces and nephews saw these cookies, their eyes lit up and I had them like butter in my hand. Who needs Sesame Street when you got cookies. I was happy enough that they let me take pictures of them with the cookies before they gobbled them up. These super cute DIY Nestle Toll House Birthday Sugar Cookie Bouquets are easy to put together and kids would go crazy for them. It's an inexpensive gift to tell them you care and love them. Make one for that special kid in your life.

Sweet and simple.
DIY Nestle Toll House Birthday Sugar Cookie Bouquets
Items Needed:
Nestle Toll House Birthday Sugar cookies
Lollipop sticks or wood skewers
Treat bags with ties or saran wrap
Desired container like glass canning jars, small candy buckets, Chinese Takeout Favor Boxes, coffee mugs, or clay pots
Shredded colored paper, Easter basket grass, or tissue paper
Decorative items like cupcake wrappers, stickers, ribbons, and extra goodies
Optional: Floral Styrofoam

Preparation:

Place the cookies on the baking sheet. Insert the lollipop sticks or wood skewers in the middle of the cookie. Bake the cookies according to the packaging directions. Allow the cookies to cool completely.

Cover the cookies with treat bags and ties. Use desired container and fill it two-thirds full with the shredded color paper. Arrange the cookies inside the container. Optional, you can add the floral Styrofoam to the bottom of the container so the cookies can stick. Add the decorative elements like ribbon, stickers or additional goodies into the container.

These would be perfect as table centerpieces for birthday parties, a birthday gift (tuck in a gift card to their fave place or sneak in a toy) or fantastic as party favors for the kids.

This post is brought to you by Nestle Toll House Birthday Sugar Cookies. Bake some birthday love.
Disclosure: As part of the DailyBuzz Foodbuzz Tastemaker Program, I received a stipend to taste Nestle Toll House Birthday Sugar Cookies. All opinions expressed are my own.

Friday, August 31, 2012

S'mores Whoopie Pies

Happy Friday and Happy 4th Blogiversary!

4 years ago I started out with this post and continued to publish more food posts to document my journey as a newlywed wife. After my first successful Good Eats Roast turkey, I was driven to cook and bake everything that our hungry stomachs craved. Blogging here has become a big part of my everyday life and I can't thank my husband, my family, my friends and my readers for reading my posts this entire time.

Reflection on the past year and highlights:

  • My little cookie in the oven was born and Elena has been the best addition to our lives.
  • I had an awesome virtual Cuban-Filipino baby shower fiesta thrown by my fabulous food blogging friends. (I still have wild dreams of this fantastic spread).
  • I baked up the sweetest Spumoni Ice Cream Layer Sundae Cake for my birthday. 
  • Meatless Mondays (MMs) were a great way to save on our grocery budget and one of my favorite meal planning days. I need to get back on the bus for posting MM again. 
  • Eric and I hosted our first Noche Buena with our family and we roasted a 75 pound Lechon Asado (roasted pig).
  • I attended my first Food Buzz Conference in San Francisco and met a lot of fabulous bloggers who are just as awesome in real life. 
  • My most popular post of Buffalo Chicken Tacos has circulated quite a bit especially on Pinterest.
To celebrate and honor my 4th Blogiversary, I baked up these sugary addicting treats of S'mores Whoopie Pies. They are like little soft graham cracker cookie cakes filled with homemade marshmallow fluff and mocha cappuccino hazelnut spread or cookie butter. It's one homemade sandwich cookie that will rock your world and it would be a fantastic sweet treat to enjoy during this Labor Day weekend. 

Thanks a million times for reading here and hurry up and make some Whoopie (pies)!

S'mores Whoopie Pies
Adapted from Cookies & Cups
ZipList Add Recipe
{Printable Recipe}

Wednesday, June 20, 2012

Lemonade Sugar Cookies

Summer is almost here, and I absolutely love it. Sunny filled days past your normal dinner hours, awesome natural light for food blogging, the new season of Breaking Bad (I watched seasons 1 through 3 last week on Netflix and I'm currently waiting for Season 4 to stream), and the need for simple summery treats.

I'm all about baking scrumptious sweets these days because of my weak sweet tooth. Which totally defeats the purpose of losing those post-pregnancy pounds. If I want something sweet, my rule is that I have to make it and share it. Baby steps, I tell myself. I won't tell you how many more pounds that I have to go, but I have been dropping the weight slowly but surely.

I don't consider myself on a diet really, but I'm making healthy eating choices and counting calories to help shed the baby weight. These cookies are a little splurge on those days when I needed a little sugary pick-me up. I'm a fan of all things citrus and I knew I had to make these cookies ASAP before my harvest of Meyer lemons would dwindle down again. You can easily substitute using limes or oranges to make these cookies, too. 

Soft, sweet and a taste of summer all in a cookie! 
Lemonade Sugar Cookies
ZipList Add Recipe

Sunday, April 15, 2012

Peanut Butter & Blueberry Jelly Macarons

Peanut butter and blueberry jelly are one of my favorite combinations in a sandwich. How can you not love peanut butter and jelly? YUM! You can probably say it's been my default breakfast or second breakfast of mine. It's one of those pregnancy cravings that I have been enjoying these past couple of months. It's a nice throwback to those childhood days. Recently, a bunch of food blogger friends wanted to challenge themselves in a macaron challenge. I knew this was the flavor combination that I wanted to try and duplicate in a macaron form.

I have loved macarons ever since the first taste of them from Bouchon Bakery a couple years ago. It was love at first bite. I haven't baked macarons in awhile, and I thought the macaron challenge might inspire me to bake up something fun and delicious. These macarons were a bit challenging because I haven't worked with peanut flour before and my batter was slightly off than I liked when working only with almond flour. However, the peanut flavor really shined through when mixed with the almond meal, and these macarons were definitely a playful spin on a fancy cookie.

It's peanut butter and jelly macaron time!!

Peanut Butter & Blueberry Jelly Macarons
Adapted from Tartelette
Printable Recipe
Ingredients:
55 grams peanut flour, or roasted peanuts, ground fine
55 grams almond meal, or slivered almonds, ground fine
200 grams confectioners sugar
20 grams freeze dried blueberries, ground fine
2 teaspoons blue food coloring, gel or powder *optional
25 grams granulated sugar
3 large egg whites, room temperature

Filling:
Peanut Butter
Blueberry Jelly

Preparation:

Line 2 baking sheets with parchment paper or baking silpat mats.

Sift together confectioners sugar, almond flour, peanut flour, ground blueberries in a medium bowl.

In the bowl of the stand mixer with the whisk attachment, whisk the egg whites until they appear foamy, about 1 minute or so. While the mixer is running, add the granulated sugar in a slow stream and continue mixing until egg whites are creamy and frothy. Do not overmix the egg whites.

Add the sifted dry ingredients to the egg whites all at once. Add in the blue food coloring. Using a spatula, fold in the dry ingredients together with the meringue. Fold the batter about 50 strokes or so, until the mixture resembles a thick pancake batter.

Place the mixture into a pastry bag fitted with a plain tip and pipe small rounds onto the prepared baking sheets. Carefully smack the baking sheets on the counter a couple times, to remove any extra bubbles. Let the macarons set for 30 to 60 minutes, until the shells have hardened a bit.

Preheat the oven to 300 degrees.

Bake the macarons for 15 to 17 minutes, depending on the size some may require more or less time. Allow them to cool, then transfer to a cooling rack.

When macarons have cooled, spread a small layer of peanut butter on one macaron shell and blueberry jelly on another and sandwich together. Refrigerate for 24-48 hours. Bring to room temperature before serving.

Yield: 16 to 20 cookies

Review: Not my best batch of macarons but definitely a sweet and playful spin on the classic macaron. I bought my peanut flour at Trader Joe's in the baking section, and if you are unable to find peanut flour - you can make your own by grounding up roasted peanuts. Nutty, sweet and blueberry-delicious!!

Friday, April 13, 2012

Biscoff Cookie Dough Balls

Happy Friday!

It's a wet day here in SoCal, and the gloomy April showers are here. I really wish I had my vegetable garden blossoming away because the rain would be so beneficial, but Eric and I have been so busy preparing for cookie's arrival that my garden is lacking. However, for now my tomatoes from last season are sprouting new flowers as well as my citrus trees. If I manage to find time in the next 4 weeks before cookie's estimated due date, maybe I will have some vegetables come summer. (Can you believe that I'm 36 weeks already?!?! EEKS!)

For the most part, I have been baking goodies and starting to freeze some meals in anticipation for cookie's arrival. I know the lack of blog posts are quite evident, but be rest assured that I'm still cooking in the kitchen. I even prepared Good Friday dinner last week: my go-to recipe of fish tacos and an awesome cheese dip and irresistable creme brulee that I'll be sharing next week. It's exhausting growing a baby, but I'm really looking forward to the day of meeting our little one soon enough, too.

These biscoff cookie dough balls are probably in my top sweets list right now. Biscoff butter is sorta similar to Nutella and peanut butter, it's a sweet cookie spread that you can eat by the spoonfuls from the jar and not feel guilty about it. (I'm totally guilty of this by many occasions.) Anything made out of a cookie, made into a luscious cookie spread - has to be something brilliant and awesome. If you have had a biscoff cookie, it's a buttery, brown-sugar cookie that has a bit of spice to it. It's heavenly, trust me. It's one fantastic cookie made into a creamy cookie spread and then you add a bit to your basic chocolate chip cookie dough recipe. You have one cookie that you can't stop eating byt the platefuls. Mmmmmmm.

Make these soon and get your spoon's ready for some biscoff love!

Biscoff Cookie Dough Balls
Adapted from The Novice Chef
Printable Recipe
Ingredients:
6 tablespoons butter, room temperature
1 egg, room temperature
1/3 cup Biscoff spread
1/2 cup light brown sugar, packed
1/4 cup granulated sugar
1 teaspoon vanilla extract
2 cups all purpose flour
1/2 teaspoon baking powder
3/4 teaspoon salt
3/4 cup semi-sweet chocolate chips

Preparation:

Preheat oven to 350 degrees. Prepare your cookie sheet pans with a baking silpat or parchment paper.

In the bowl of the stand mixer, cream together butter, Biscoff spread, and sugars until well combined. Add egg and vanilla and beat until thoroughly combined (be sure to scrape down the sides of the bowl).

In a separate medium bowl, whisk together the flour, salt, and baking powder. Add half of the dry mixture to the wet ingredients and mix until it starts to come together.

Add the remaining half of the dry mixture to the wet ingredients, and mix until well combined. Do not overmix. Fold in the chocolate chips.

Using a small cookie scoop or a tablespoon, scoop cookie dough onto the cookie sheet. Place them evenly spaced apart at least 1 1/2 inches apart. The cookies do not need a lot of space and they will not spread out.

Bake for 10-12 minutes. They are dough balls, not cookies. You want them to be soft on the inside.

Remove from oven and allow to cool and set for 2-3 minutes on the baking sheet before transferring to a cooling rack.

Enjoy immediately! Best enjoyed warm.

Yield: 2+ dozen

Review: Simply sensational, and addicting. If you love peanut butter, you're going to love Biscoff. I found my Biscoff spread at Cost Plus World Market, but Trader Joe's has a similar version called Specaloos. It's the same thing, and you can easily substitute it.  

Wednesday, February 29, 2012

Peanut Butter Oatmeal Chocolate Chip Cookies

I can't believe this month is practically over, and March is around the corner. I love my birthday month and might have celebrated a couple times over. Plus, I'm already dreaming about my next year's birthday with cookie in tow. Things surely will be different with a little one around, and I can hardly wait. A future little kitchen helper/taste-tester will be gladly appreciated.

Lately, I have been in love with the color pink, and maybe it's because I'm leaning towards cookie to be a girl, but I know that there is a 50% chance that cookie might be a boy, too. Cookie has 10 more weeks to bake and I can't wait to meet him/her. I baked up these peanut butter oatmeal chocolate chip cookies because I had randomly picked up some pretty in pink M&Ms at Target. Eric and I aren't big on Valentine's Day, but I still baked them for everyone to enjoy something sweet. They are simple enough to prepare and look extra pretty with the pink M&Ms. However, they would look just as pretty with regular colored M&Ms, too.
Peanut Butter Oatmeal Chocolate Chip Cookies
Adapted from Picky Palate
Printable Recipe
Ingredients:
1 cup butter, room temperature
3/4 cup sugar
3/4 cup brown sugar, packed
2 eggs
1 teaspoon vanilla extract
3 cups flour
1 teaspoon baking soda
1/2 teaspoon salt
1 cup rolled oats
1 1/2 cup semi-sweet chocolate chips
1 (9.90 ounce) bag Peanut Butter M&Ms

Preparation:
Preheat oven to 350 degrees. Prepare the cookies sheets with parchment paper or silpat baking mat.

In the bowl of the stand mixer, cream together the sugars and butter until light and fluffy. Add the eggs and vanilla extract and mix until combined. Scrape the sides down as needed with a spatula.

In a large bowl, whisk together the flour, baking soda, and salt. Slowly incorporate the dry ingredients with the wet ingredients until combined. Add the rolled oats and chocolate chips. Mix until combined. Add about 3/4 bag of the Peanut Butter M&Ms.

Using a small cookie scoop, scoop dough onto prepared cookie sheet placing them at least 1 inch apart. Press cookies down slightly and add additional M&Ms to the top.

Bake for 10 to 12 minutes, until slightly golden. Remove from oven, and let cool on cookie sheets for 10 minutes before placing on cooling rack.

Yield: 3 dozen cookies

Review: I love any cookies with M&Ms, and you can interchange any flavored M&Ms to your liking. But I love the little bursts of peanut butter mixed with the sweet chocolate chips. Make sure to have a tall glass of milk to eat with all those cookies!
Pin It

Tuesday, February 14, 2012

Soft Sugar Cookies

Happy Valentine's Day!

My husband and I don't celebrate this lovey dovey holiday because my birthday takes reign the first half of this wonderful month. Besides we find ways everyday to say "I love you" without the assistance of this consumer ridden holiday. I really don't mind because I may have had three birthday dinners in my name already! Plus, I still have an awesome dinner planned with my wonderful friends this weekend to celebrate my birthday, too.

These soft sugar cookies are simple to prepare, and one of my favorite ways to use those colorful themed sprinkles. I love adding sprinkles or sanding sugar to cupcakes, but it never has the same effect when you put them on cookies. You have probably seen these particular style of cookies everywhere on the foodie bloggy-sphere. Or mainly because they are similar to the Lofthouse style cookies that you can find at the grocery store. Either way, these cookies are a fabulous way to share your hugs and kisses.

Have something sweet today especially these cookies.
Soft Sugar Cookies
Adapted from The Novice Chef
Printable Recipe
Ingredients:
Cookies:
6 cups flour, divided
1 teaspoon baking soda
1 teaspoon baking powder
1 cup butter, room temperature
2 cups granulated sugar
3 eggs
1 teaspoon vanilla extract
1 1/2 cups sour cream
Frosting:
1 cup butter, at room temperature
1 teaspoon vanilla extract
4 cups powdered sugar
6 tablespoons milk
Sanding sugar/sprinkles

Preparation:
In a large bowl, whisk 5 cups of flour, baking soda, and baking powder. Set aside.

In the bowl of a stand mixer, cream the butter and sugar at medium speed until light and fluffy, about 2 to 4 minutes. Make sure to scrape the sides and bottom of the bowl as needed with a rubber spatula. Add the eggs one at time, mixing until it is incorporated. Add the vanilla and sour cream and beat at low speed until combined.

Add the dry ingredients and mix at low speed until just combined, about 30 seconds, scraping down the bowl as needed. Dough needs to obtain the right consistency for rolling, so add additional flour, 1/4 cup at a time, until this is achieved (up to 1 cup more flour). Divide dough into two sections. Flatten into rectangles about 1 1/2 inches thick, then wrap with plastic wrap. Chill in the fridge overnight or for at least 4 hours.

When ready to bake the cookies; preheat the oven to 425 degrees. Line 2 large baking sheets with silpat (silcone baking mat) or parchment paper. Set aside.

Generously flour your work area and rolling pin. With a rolling pin, roll the dough out to 1/4-inch thickness. Using your preferred cookie cutters, cut out with the cutter and transfer to a baking sheet.
Bake for 7-8 minutes, until pale golden. Immediately transfer cookies to a cooling rack.

Frosting:
In the bowl of a stand mixer, cream together the butter and vanilla until light and fluffy. Slowly add in the powdered sugar. Once smooth and creamy, add in milk, 1 tablespoon at a time until the desired spreading consistency is achieved.

Once cookies have cooled completely, frost and add sanding sugar/sprinkles. Allow frosting to set, then store in an air-tight container.

Enjoy!

Yield: 4 to 5 dozen cookies
Review: Tastes just like the store-bought cookies...but so much better! It doesn't taste as sweet, and I love that I can make these cookies for any holiday. Sugar cookies are not my particular forte, and these are simple enough to prepare and frost without the fancy frosting job. I think colorful sprinkles are a way to my heart...and tummy!
Pin It

Friday, December 16, 2011

Caramel Appledoodles

Happy Friday! Can you believe that we are 9 days away from Christmas?!?!

I am almost finished with my holiday baking craziness and finished some cute little Christmas buckets for some special ladies. I know they will get their surprises later tonight, and they might be reading my blog right now. But I just wanted to give something special to you...just because I love the holiday baking spirit, and because you are awesome. That's all. ;-)

After my baking craziness, I wanted to start wrapping presents. What a concept, instead of placing gifts into cute Christmas themed gift bags but to my avail I had run out of tape. Christmas fail on my part. I forgot to take inventory on wrapping supplies, but I had plenty of Christmas wrapping paper yet no tape. Luckily I had a plate of these Caramel Appledoodles to enjoy instead of my Christmas wrapping duties.

These are sweet caramel-y apple goodness on a plate. Thank Nicole and Jey for teasing me with their cookie posts for finally baking these up. I truly love the simplicity of old-fashioned snickerdoodles because what's not to love about sugar and cinnamon..it's always nice. Hehe. Yet, with the addition of the apple and caramel bits, this irresistable cookie is taken to a higher sugar-y blissful heaven. You might want to make a double batch because they might be hard to share with others. I'll wrap gifts tonight, and probably enjoy another plate of cookies, too.

Caramel Appledoodles
Adapted from Prevention RD & The Jey of Cooking
Printable Recipe
Ingredients:
8 tablespoons (1 stick) unsalted butter, room temperature
2/3 cup brown sugar
2/3 granulated sugar
2 eggs
2 cups all-purpose flour
2 tablespoon cornstarch
1 teaspoon baking soda
1/2 teaspoon salt
1/8 teaspoon fresh nutmeg
1 medium apple, peeled, cored and finely diced
1 cup soft caramels, finely chopped (i.e. Kraft Caramel Bits or Werther's Soft & Chewy Caramels)

For Rolling:
1/3 cup sugar
1 tablespoon cinnamon
pinch of nutmeg

Preparation:

In the bowl of the stand mixer, cream the butter and sugars together until light and fluffy. Add the eggs and mix until combined.

In a medium bowl, whisk together the flour, cornstarch, baking soda, salt and nutmeg. Slowly add the flour mixture to the wet ingredients and mix until on low speed until combined. Fold in the chopped apple and caramel bits. Let cookie dough mixture chill in refrigerator for 1 hour.

When ready to bake the cookies, preheat the oven to 350 degrees. Line your baking sheets with parchment paper or silpat baking mat.

In a small bowl, mix the 1/3 cup sugar, cinnamon and nutmeg until combined. Using a tablespoon or small cookie scooper, roll the balls of cookie dough in the sugar mixture. Place on prepared baking sheets about 3 inches apart.

Bake for 14 to 16 minutes, turning the pan midway baking time (only if you don't have a convection oven).

Let cookies rest on baking sheets for at least 5 minutes before placing on cooling racks. Enjoy immediately and try not to eat them all.

Yield: 40 cookies

Review: Purely addicting and sooo scrumptious. Plus, I had a chance to meet up with Alicia, an anniversary nestie, and her adorable daughter while they were in town. Natalie just turned one year old this past month and I foresee her as a future baker in the making because she absolutely loved my cookies and my DIY flower headband. (Thank you Pinterest!) She totally made my day complete and my heart melt like butter. If my baby is a girl, can you imagine how much fun we will have together in the kitchen? Eeks!

Other Christmas Homemade Ideas:
Peppermint Bark Cheesecake Truffles by The Nifty Foodie
White Chocolate Cranberry Pecan Cookies by The Granola Chronicles
Homemade Peppermint Marshmallows with Homemade Hot Chocolate Mix from me

Cookie Update: Guess who is 19 weeks already!! We finally got our Christmas tree up and decorated. I love it! Next week, we get our 2nd trimester ultrasound and Eric and I are so excited to see how big our little cookie is baking. We won't be finding out the gender of the baby because we chose to be surprised at birth. Am I having a girl or boy? I'll let you keep guessing. ;-)

Friday, December 9, 2011

Chocolate Peanut Butter Cup Cookies

Are you in full Holiday Christmas spirit yet? There are only 15 days left until the big C-day!!! My husband and I are running a little behind at our house because we had to finish some house projects these past couple of weekends that were top priority. (My in-laws are coming in 2 weeks, so we have been cleaning and prepping away like crazy!!) I'm still waiting to buy our Christmas tree and finish the rest of our Christmas decorating. Hopefully, this weekend we will have our beautiful tree and the outside Christmas lights finished.

Last year I did a whole Christmas Cookie series called the Twelve days of Christmas cookies and treats. Everyone loved all of my delicious treats and I was on a permanent sugar high until the new year! This holiday season, I'm taking a little more practical and sensible approach for Christmas and doing everything homemade aside from just cookies and treats. I'll list some homemade Christmas gift ideas that will be perfect for your friends, family, neighbors and even those lovable yet quirky co-workers. I saved the idea from Shawnda's Christmas posts from last year and used a couple of her suggestions.

To start of the series, I wanted to use up some of my hidden stash of Halloween candies. (Hanging my head in shame.) For some odd reason, I had a handful of Reese's peanut butter cups still in my stash. I promise that I gave out handfuls of candy to the kiddos, but this was just the one candy that never left my house. The best way to use up these Reese's peanut butter cups were in either baked up or eaten. Plus, I had some of the mini peanut butter cups from Trader Joe's that were perfect on top of these sinful treats.

Chocolate Peanut Butter Cup Cookies
Adapted from Annie's Eats
Printable Link
Ingredients:
1 1/2 cups plus 2 tablespoon all-purpose flour
6 tablespoon Dutch-process cocoa
1/2 teaspoon baking soda
1/2 teaspoon kosher salt
6 tablespoons unsalted butter, room temperature
1/4 cup plus 2 tablespoon peanut butter (I used a mix of creamy & crunchy)
1/2 cup granulated sugar
1/2 cup light brown sugar
1 large egg, room temperature
1 teaspoon vanilla extract
2 tablespoons milk
2 cups peanut butter cups, coarsely chopped and divided
*Note: Freeze the peanut butter cups for at least 30 minutes before chopping. It makes them easier to chop and helps them stay intact when you fold them into the cookie dough.

Preparation:

Preheat the oven to 350 degrees. Line baking sheets with silpat or parchment paper.

In a medium bowl, whisk together the flour, cocoa powder, baking soda and salt until combined.

In the bowl of the stand mixer, cream the butter, peanut butter and sugars until blended. Beat on medium speed until light and fluffy. Add in the egg, vanilla extract and milk. Blend until combined, and scrape down the sides if needed. With the mixer on low speed, slowly add the dry ingredients until incorporated. Fold in 1 1/2 cups of the chopped peanut butter cups and fold gently with a spatula.

Using a medium or large cookie scoop (about 2 to 3 tablespoons) drop spoonfuls of dough onto the prepared sheets. Gently press a couple of the reserved peanut butter cups into the top of the cookies.

Bake for 12 to 14 minutes, rotating the pans halfway through baking (if you don't have a convection oven). Let cookies cool on baking sheets for 10 minutes and transfer to the cooling rack to cool immediately.

**Cookies may seem extra soft after coming out of the oven but they will set when they are cooled.**

Yield: 24 medium sized cookies or if you go bigger (about 16 to 18)


Review: Who doesn't love peanut butter and chocolate? It's the one of the best sweet peanut-ty combinations that I love and adore, next to peanut butter and jelly. I made this batch specifically for my cute nephews and niece that I don't see too often. I prepped them in cute little Christmas cookie bags so they could have something sweet when my sisters' deemed they were doing extra good that day.

From what my sisters told me, the kiddos loved it and were totally excited for their bags. Who wouldn't love a preview of sweet Christmas treats before the big C-day right? The funny thing, the big kids like my brother-in-law loved the cookies as well (I packed a couple extra bags) and called to thank me for the best cookie ever and to tell his wife (my sister) the recipe. He wants another batch!!! Thanks Duaine! And ahem, Karen - make these cookies!!!

Friday, November 18, 2011

Pumpkin Cookies with Browned Butter Frosting

Happy sweets day Friday!!

I can't believe Thanksgiving is less than a week away! Have you finalized your Thanksgiving plans yet? I'm working on my Friends-giving dinner that is happening tomorrow! I have a fresh turkey to brine tonight, prep work for my roasted corn with chiles, cranberry sauce and all that last minute clean-up of the house. Luckily, it's a potluck style dinner, and my awesome friends are bringing plenty of side dishes, desserts and drinks to boot. It's going to be one awesome feast, it's like the warm-up to the actual big turkey day.

I wanted to quickly share this recipe that I have been in love with and neglected to post about. These pumpkin cookies are easy to prepare and perfect for all you pumpkin lovers. I don't think I have had filled my pumpkin quota of recipes just yet, and this another wonderful one to enjoy. These pumpkin cookies are more cake-like than a typical crunchy cookie. Make sure to make the browned butter frosting, it gives that extra light and smooth touch to the sweet treat.
Sweet and simple.

Pumpkin Cookies with Browned Butter Frosting
Adapted from Prevention RD
Printable Recipe
Ingredients:
⅔ cup sugar
⅔ cup packed brown sugar
¾ cup unsalted butter, softened
1 teaspoon vanilla extract
½ cup pumpkin puree
2 eggs
2 ¼ cups all-purpose flour
1 teaspoon baking soda
1 teaspoon ground cinnamon
½ tsp salt
Browned Butter Frosting:
3 cups powdered sugar
1 teaspoon vanilla extract
3 to 4 tablespoon milk
⅓ cup unsalted butter

Preparation:

Heat oven to 375 degrees. Line your baking sheets with a silpat or parchment paper.

In bowl of the stand mixer, cream together the sugar, brown sugar, ¾ cup butter and 1 teaspoon vanilla on medium speed until light and fluffy. Make sure to scrape down the butter on the sides and very bottom of the bowl until well blended. Add in the pumpkin and eggs and mix until combined.

In a medium bowl, mix together the flour, baking soda, cinnamon and salt. Add the flour mixture to the wet mixture in three small intervals until completely combined.

Using a small cookie scooper or 1 tablespoon, drop the cookies onto the prepared baking sheets.

Bake 10 to 12 minutes or until almost no indentation remains when touched in center.

Remove quickly and place on cooling rack and let cool completely, about 45 minutes.

In medium bowl, add the powdered sugar, 1 teaspoon vanilla and 3 tablespoons milk. In 1-quart saucepan, heat 1/3 cup butter over medium heat, stirring constantly, just until light brown.

Pour browned butter over powdered sugar mixture. Beat on low speed about 1 minute or until smooth. Gradually add just enough of the remaining 1 tablespoon milk to make frosting creamy and spreadable. Generously frost cooled cookies.

Yield: 3 1/2 dozen cookies.

Review: Heavenly pumpkin cookies. Just make them, and you will thank me later. It's a wonderful Thanksgiving treat to bring and share with your friends and family. Yum.

Tuesday, September 27, 2011

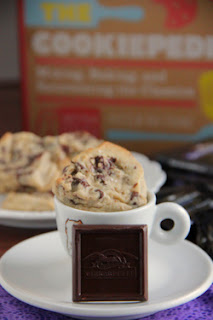
Chocolate Chip Cookies with Ghirardelli's Sea Salt Soiree

I had been reading over a new cookbook from Stacy Adimando, and "Cookiepedia" instantly drew me in. Most cookbooks with sweets usually have a sweet soft spot for me because I can always use inspiration in the kitchen. This Cookiepedia will be your most trusted companion in the kitchen and contains dozens of the best recipes for a variety of delicious cookies. It's a well-thought and organized cookie book for any home baker, and I will be using some of the recipes in the coming months of holiday treats.

Coincidentally, the Foodbuzz Tastemaker program had sent myself some samples of Ghirardelli Intense Dark Chocolates of Sea Salt Soiree, Twilight Delight, and Midnight Reverie. LOVE. Well, I could have easily eaten the fancy selection of chocolates by themselves, but that was the easiest and most obvious choice. I wanted to highlight the intense chocolates using one of Stacy Adimando's recipes. Chocolate chip cookies were the logical choice and are the quintessential classic treat. It was an easy substitute of the bittersweet chocolate chunks for the Ghirardelli Sea Salt Soiree, it seemed like a perfect match in cookie heaven. The other two seemed perfect for brownies or triple chocolate chip cookies, both to be made at a later date in my kitchen.
These soft and chewy cookies were intensified to a sweeter level with the sea salt soiree. Sea salt soiree is a dark chocolate with bits of almonds and sea salt. These seriously were the best chocolate chip cookies that I have baked in a long time. Soft, chewy, and the chocolate had melted in your mouth. I did follow Stacy's tip of chilling the dough before baking the cookies away, and it created the ultimate chocolate chip cookie.
Sweet and sinful chocolate heaven.

Chocolate Chip Cookies with Sea Salt Soiree
Adapted from Cookiepedia
Printable Recipe
Ingredients:
1 ½ cups flour
½ teaspoon baking soda
½ teaspoon kosher salt
½ cup unsalted butter, room temperature
⅓ cup sugar
½ cup light brown sugar
1 large egg
¾ teaspoon vanilla extract
1 cup (8 ounces) Ghirardelli's sea salt soiree chocolate chunks, or bittersweet chocolate chips

Preparation:

Preheat the oven to 350 degrees and line baking sheets with parchment paper or silpat.

In a small bowl, sift together the flour, baking soda, and salt. Stir to combine.

In the bowl of the stand mixer, cream the butter and sugars until light and fluffy Add the egg and and vanilla extract and mix until combined. Add the flour mixture into the butter mixture on low speed until they are combined. Fold in the chocolate chunks.

*Tip: For the thickest, chewiest cookies, chill the dough for 1 to 2 hours or overnight. Roll it up the cookie dough in parchment paper, and slice up the cookies when ready to bake.

Using a small cookie scooper, scoop about 1 heaping tablespoon onto the prepared baking sheet. Add a pinch of kosher salt to each cookie if desired. Bake for 8 to 10 minutes, rotating the sheets halfway through baking.

Remove from oven, and place on cooling rack. Enjoy immediately or wait until the cookies have completely cooled.

Yield: 24 cookies
*Disclaimer: The product was provided to me as part of the Foodbuzz Tastemakers Program. No other compensation was received for this post. The post was written by myself and all opinions expressed are solely mine.
**Thank you to Quirk Productions for sending myself a copy of Cookiepedia to review, too.

Review: A heavenly chocolate chip cookie perfected with the sea salt soiree chunks, bittersweet chocolate chunks might be just as tasty. My husband's office was lucky enough to get my test batch of these cookies, and I told they were a hit with at his regional meeting. Thank goodness he brought in my sweets on meeting day, what a way to make a sweet impression with your fellow employees.

Wednesday, July 20, 2011

Pistachio & Dried-Cherry Biscotti

Let me introduce you to my mom’s favorite sweet treat. Biscotti.

If you have tasted the store-bought versions they are typically hard as a rock to bite into, and definitely not worth losing a tooth for. It’s nothing like a typical soft cookie. Yet, a wonderfully homemade batch of biscotti – are totally opposite. They have a sweet and crispy texture because they are baked twice and have a slight softness like a cookie.

Biscotti are traditionally made with almonds, but you can use any variation of nuts that you prefer. If you want to fancy them up a bit, you can dip them with chocolate for that extra sweet factor, too. I loved the wonderful combination of delicate pistachios and tart cherries in this recipe. Nutty and sweet.

I made a batch of biscotti for an Italian-themed party and for my mom because this recipe makes plenty to share. Biscotti's are a nice substitute for cookies and you can store them in plastic containers and they should last for at least a week or two. The good thing about biscotti is that you can store them and enjoy them whenever you please, and you never feel compelled to finish them all in one sitting. Unless you wanted to.

Pistachio & Dried Cherry Biscotti

Pistachio and Dried-Cherry Biscotti
Adapted from Bon Appetit May 2011
Printable Recipe
Ingredients:
2 cups all-purpose flour
1 cup sugar
½ cup rolled oats
1 teaspoon baking powder
½ teaspoon baking soda
2 large eggs
3 Tablespoon olive oil
1 tablespoon orange zest
2 teaspoon lemon zest
1 ½ teaspoon vanilla extract
½ teaspoon almond extract
1 cup dried cherries
1 cup unsalted, shelled pistachios


Preparation:

Preheat oven to 350 degrees. Line two baking sheets with silpat or parchment paper. Make sure that the top rack is on the second to the highest tier and the lower one is in the middle.


In a large bowl, whisk together the flour, sugar, oats, baking powder, baking soda, and salt. In the bowl of the stand mixer, mix the eggs, olive oil, orange & lemon zest, vanilla & almond extract until combined.

Slowly add the dry mixture to the wet ingredients until combined. Fold in the dried cherries & pistachios.


Transfer the dough to a lightly floured work area and divide the dough in half. Using floured hands, shape each dough half into a 16” inch long log. Wipe the excess flour off if any, and carefully transfer the logs to one of the prepared baking sheet. Flatten each log into a 2” inch wide strip.


Bake for 30 minutes, rotating midway cooking time. Transfer to a cooling rack and let cool for 15 minutes.

Reduce the oven temperature to 250 degrees. Using a serrated knife, cut strips into ⅓ inch thick slices, and transfer back to the baking sheets with cut side down.


Bake the biscotti for about 40 minutes, and remove from oven. Place on cooling racks.

Yield 4 dozen biscotti

Review: I love having biscotti any time of the day for breakfast, lunch or dinner. It’s the kind of cookie that I can eat one and walk away. My mom absolutely loves these biscotti because she loves to pack them up in her lunch bag and munch on them while she works. She is already requesting another batch for me to bake up.

Pin It button on image hover