Mrs. Regueiro's Plate: Cupcakes
Showing posts with label Cupcakes. Show all posts

Monday, August 26, 2013

Pot of Gold: Jessica's Virtual Baby Shower

It's time for a virtual party! A virtual party is when a group of blogger friends choose a day to write a post to celebrate such a blessing in their life. It's one way to shower their friend with love and it is a special way to share the dishes that we might be enjoying if we were all together in real life. The hardest part of the virtual party is that most of us all live far away from each other but that doesn't stop us from showering our friends with love.
Today Jessica of My Baking Heart and I are co-hosting a baby shower for Jessica of Sunny Side Up. She is expecting her first baby anytime now - a sweet baby girl! As you may know if you don't already, Jessica and Jesse have named their sweet daughter, Maeve. It comes from Irish descent and Jessica absolutely loves Irish dancing. Jessica and I wanted to do a little Irish jig (if we could) to celebrate and help welcome her little bundle of joy Irish style, so we came up with the perfect theme - Pot of Gold!

Jessica is a dear friend to me who I had met a couple years ago on a cooking board and we actually met in real life at a food blogger conference and also have had a couple meet-ups afterwards as well. We have been friends ever since and I have been slowly waiting for the day for her to become a mommy. Jessica is pretty awesome with kids (she was a part-time nanny), cooks and bakes yummy and delicious foods like this incredible Tuxedo Layered Cheesecake or one of favorite meals Spicy, Sticky, Sweet Asian Meatballs and is a very thoughtful and caring friend and her down to earth charm is infectious. She is one of my all-time favorite bloggers that continues to inspire me and a true sweetheart of a friend. I know that Jessica is going to be one fantastic mommy and will shower her little pot of gold with so much love.

To celebrate Jessica's Pot of Gold baby shower, Jessica and I have gathered a fabulous group of Jessica's favorite bloggers for a virtual shower. Everyone has prepared plenty of delicious treats and mouthwatering eats for this wonderful Pot of Gold virtual baby shower.

First up, Katie of So Tasty, So Yummy baked a Chocolate Guinness Cake. Chocolate and beer in a cake? This scrumptious sweet treat is a must for any Irish celebration if you ask me. Pure genius (Guinness).
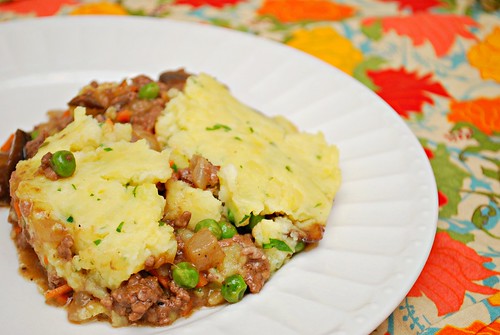
A fellow friend of ours, Joelen of What's Cooking Chicago made a tasty Shepard's Pie. This is a staple in Irish cooking and definitely a meat pie that we would all enjoy. Highly satisfying!
Next up, Amber of Sugared Whisk made these fantastic Irish Egg Rolls. These tasty and filling appetizers are a perfect alternative to the typical corned beef and cabbage. Heck yes!
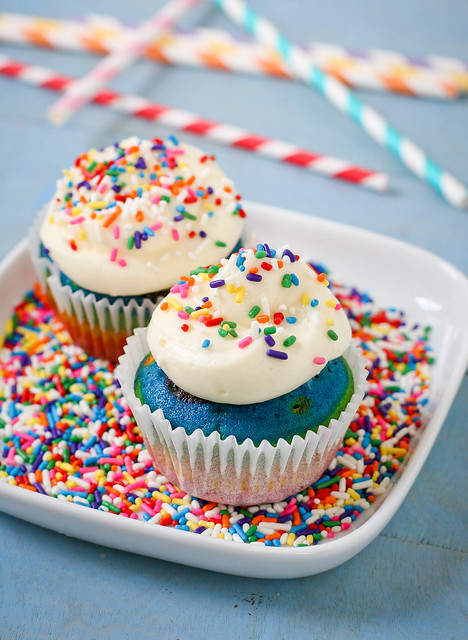
Krissy of Dainty Chef baked up these gorgeous Rainbow Cupcakes. These colorful rainbow cupcakes are perfect for this Irish celebration because they are fun to make and eat as well. It's like eating all the colors of the rainbow!
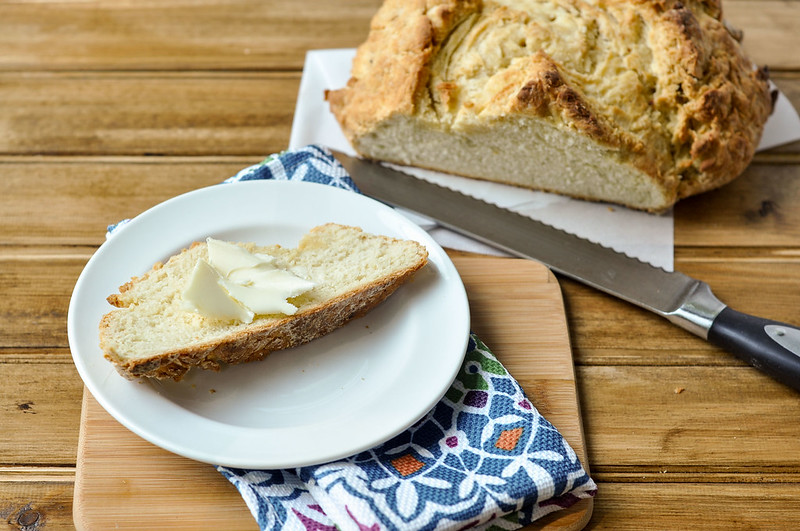
Rachel of Good Thymes and Good Food baked up one of my favorite dishes that I love to indulge on of Irish Soda Bread. This Irish classic is best when served warm with good butter, especially Irish butter if you can find it.
Kelsey of Apple a Day baked up a batch of some savory Irish Cheddar Scones. These scones are the perfect Irish indulgence - cheesy and buttery carb-y heaven. Yes please!
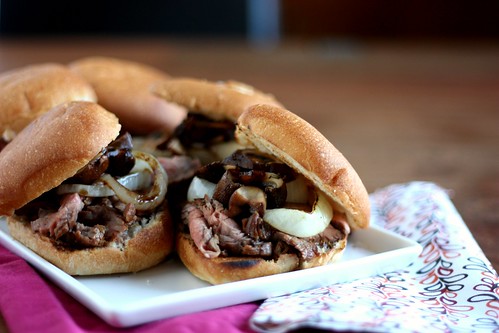
Elly of Elly Says Opa made a tray of Steak and Guinness Sandwiches. This fancypants steak sandwich is a beautiful marriage of beef and Guinness. Can I have a tray of these right now?
Nikki of Seeded at the Table made this gorgeous End of the Rainbow Fruit Salad. This End of the Rainbow Fruit Salad is the first book in a series of kids cooking-related books from the Kitchen Club kids. Kid-friendly recipes are a must for any future baby foodie! Smart thinking mommy Nikki!
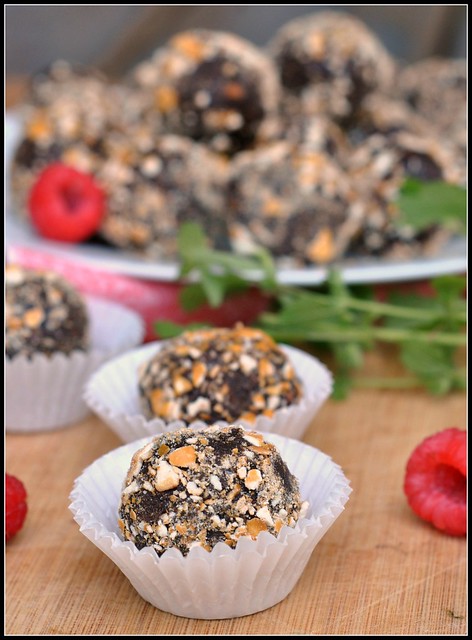
Another mutual friend of ours, Nicole of Prevention RD, made these irresistible Guinness and Pretzel Truffles. I have to get my hands on some Guinness and try these suckers out because they sound ahhh-mazing!

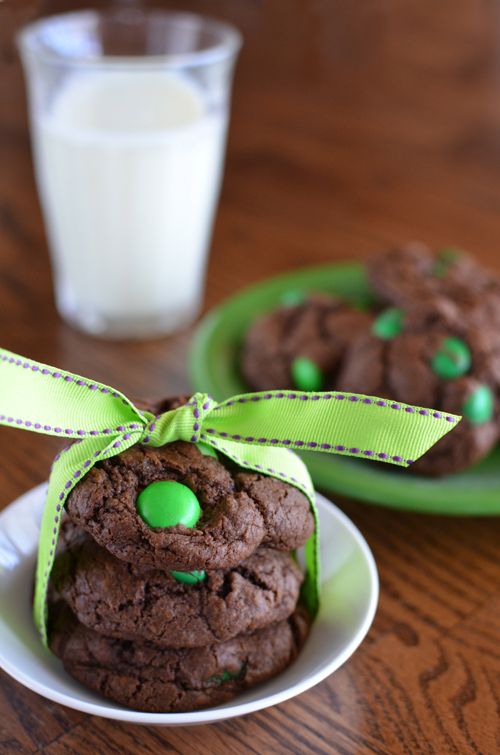
Jessica my fellow co-host of My Baking Heart made Chocolate Mint M&M Cookies. Jessica must have been on the same cooking mindset as myself because I used Mint M&Ms in my recipe as well. Any M&M cookie is a winner but this Chocolate Mint version will have you addicted!
Finally, for my own contribution, something that every pregnant woman wants/needs/must-haves are the perfect icy cold sweet treat - Shamrock Ice Cream. You always need to wear green for St. Patrick's Day to avoid getting pinched and I wanted to make something that was green enough to eat! I was inspired from Suzanne to make a batch of Shamrock Ice Cream. It's funny but I have been on an ice cream making kick lately, and I'm not even pregnant! My adaptation has mint Oreos and mint M&Ms making it the ultimate minty green concoction.

Shamrock Ice Cream
Adapted from The Perfect Scoop & Inspired from Kokocooks

Yield: 1 pint
Ingredients
  • 1 cup whole milk
  • 2 cups heavy cream
  • 1/4 cup sugar
  • pinch of salt
  • 5 large egg yolks
  • 1/4 teaspoon mint extract
  • 1 cup crushed Mint Oreos
  • 1/2 cup Mint M&Ms
  • 1/8 teaspoon green coloring
Cooking Directions
  1. In a small saucepan, warm the milk, heavy cream, sugar and salt over medium heat. Bring to a slow simmer for about 10 minutes.
  2. In a medium bowl, whisk together the egg yolks. Slowly scoop 1 cup of the warmed milk liquid into the medium bowl and whisk constantly until the egg mixture has thickened slightly. Be careful to curdle the eggs with the hot milk, remove any cooked eggs if so.
  3. Stir the whisked egg mixture back into the pot and stir the mixture together with a heatproof spatula over medium heat. It will coat the spatula. Remove from heat and chill mixture thoroughly in the refrigerator.
  4. Prepare ice cream in your ice cream maker according to the manufacturer's instructions. Stir in the green coloring until the mixture is the desired shade of green. Fold in the crushed Oreos and mint M&Ms. Place in a freezer container and let it freeze for at least 4 hours before serving.
Thank you so much to Jessica my co-host and the rest of the shower contributors. It's too bad that we all live too far away and couldn't celebrate in real life because all of these dishes sound absolutely perfect. Please make sure you check out all the fabulous dishes and scrumptious treats for this adorable "Pot of Gold" virtual baby shower.

Congratulations to Jessica on your sweet Irish baby girl. Maeve is so lucky to have parents like you and Jesse! I wish you nothing but the best as you begin your journey as a family of three. The love that your sweet child will bring you and Jesse is one of the greatest gifts that you could ever ask for.

Friday, July 12, 2013

Homemade Hostess Cupcakes

Do you remember the moment when you came to the realization that you were an adult? Or when you realized that you were too old to be a kid anymore.

Last year when I finally became a mother, I felt the pangs of adulthood smack me in the face when I realized I was responsible for the life of another human being. That is some scary stuff, but at the same time, it's been really exciting and rewarding to teach my kids things as well. Right now we are working on teaching Elena simple words like "Mami" "Papi" "thank you" and "brother." Eric and I have talked about Elena's and Emilio's first day of pre-school, and who will tutor them in math or English when they have homework, and what sports they will play in. We laughed about Emilio and all the girls that Elena will beat up on and vice versa, too. I have really felt like an adult now talking about all the things we want to teach our children and the things we want to do with them.

Friday, April 12, 2013

Sweet Tea Cupcakes for Nikki's Virtual Baby Shower

Happy Virtual Baby Shower day to my dear sweet friend, Nikki, from Seeded at the Table!

I absolutely love my wonderful and supportive food blogging community and when my friends, Jessica and Kelsey, invited a group of food, craft and life bloggers to create something in the theme of "Sweet Southern Boy" - I couldn't resist! Nikki like myself is expecting her second child this coming May, and we're both expecting boys! Her son, Judah, is an absolute gem and I know he's going to be one fantastic big brother. It's just too bad that we live 1700 miles apart because I would love playdates with our kiddos. Elena would go gaga crazy for her foodie (boy) friends.

Nikki and I had initially met online through our food blogging and officially (in real life) at the FoodBuzz Festival in 2011. We had clicked right from the start, and I have nothing but admiration, respect and love for Nikki. She is super-friendly, full of spirit and energy, loving and an absolute sweetheart. I remember rooting and screaming my head off for Nikki at the FoodBuzz Awards because she was nominated for the Best Family Food Blog. Although she didn't win, she will always be a winner in my book.

Tuesday, December 20, 2011

Chocolate Peppermint Cupcakes

The Christmas countdown is down to 5 days! YIKES!!

Are you ready for the big day yet? I have been scrambling these past couple of days to get my house and kitchen ready for Nochebuena. Nochebuena is a spanish word translating to "Good Christmas" and it's a custom celebrated in Latin America, Spain, and the Phillipines. My family and Eric's family are getting together on the 24th to roast a baby pig (only 75 pounds or so). Picture our holiday celebration as "My Big Fat Cuban/Filipino Nochebuena," it's always fun to get both sides of the family together...crazy fun!

Nochebuena is a holiday tradition that Eric's grandfather has been celebrating every Christmas Eve that Eric can remember and he loved getting all of the family and friends together. Since Eric's grandfather had passed away earlier this year, Eric and I are happy to continue the Nochebuena traditions and celebrate a big feast in Elio's honor. Elio will greatly be missed, but most likely he will be watching from above and be very happy that the family is together. Be on the lookout next week on my blog post for how to roast a pig in a caja china (Chinese box) if you're wondering how everything turned out.

I still have a couple of homemade gifts, sweets and goodies that I have been making despite my crazy Christmas schedule. We had a Secret Santa exchange at my work and I wanted to bring something sweet highlighting the Christmas flavors, chocolate and peppermint. I knew that this chocolate cupcake would be ideal and a sweet treat, it's almost like an Andes mint but one thousand times better in cupcake form. Make a batch for the holidays and keep celebrating those family traditions that are absolutely precious.
Chocolate Peppermint Cupcakes
Adapted from What's Cookin' Chicago
Printable Recipe
Ingredients:
Cupcakes:
3/4 cup unsweetened Dutch-process cocoa powder
3/4 cup hot water
3 cups all-purpose flour
1 teaspoon baking soda
1 teaspoon baking powder
1 1/4 teaspoons kosher salt
1 1/2 cups unsalted butter (3 sticks)
2 1/4 cups granulated sugar
4 large eggs, room temperature
1 teaspoon peppermint extract
1 cup sour cream, room temperature
1/4 cup chocolate chips

Frosting:
3 cups confectioners' sugar
1 cup butter (2 sticks), room temperature
1 teaspoon peppermint extract
1 to 2 tablespoons heavy whipping cream
6 candy canes, crushed to garnish

Preparation:

Preheat oven to 350 degrees. Line muffin tins with desired paper liners.

In a Pyrex glass 2 cup, whisk together the cocoa powder and hot water until smooth. In a medium bowl, whisk together the flour, baking soda, baking powder and salt.

In a small saucepan over medium-low heat, melt the butter and sugar, stirring constantly until combined. Remove from heat and pour into the bowl of the stand mixer.

With the stand mixer on medium-low speed, beat the mixture until combined. Add the eggs one at a time mixing until incorporated. Scrape down the sides if needed. Add the peppermint extract, then cocoa mixture, and mix until combined. Reduce speed to low.

Add the flour mixture in two batches, alternating with the sour cream and mixing until combined. Fold in the chocolate chips.

Using a large cookie scoop or ice cream scooper (about 3 tablespoons), divide batter into the muffin pans. Fill the batter about 2/3 full.

Bake for 17 to 20 minutes or until a toothpick inserted in the center comes out clean. Let the muffins cool in the pan for at least 5 minutes before transferring to cooling racks. Let cupcakes cool completely before icing.

Prepare the frosting. In the bowl of the stand mixer with the whisk attachment, cream the sugar and butter together. Mix on low speed until fully combined and increase speed to medium and mix for at least 3 to 4 minutes. Add peppermint extract and heavy cream, and mix until combined.

Frost cupcakes as desired (I used the standard Wilton tip in a pastry bag method) and garnished the top with crushed peppermint candy canes.

Yield: 26 to 28 cupcakes
Pin It

Review: Rich chocolate with a light peppermint tangy frosting and are simply gorgeous. I love the bits of candy canes to give the holiday effect and I found Christmas cupcake liners (Reynolds) at the grocery store. Everyone was surprised by how much they liked these cupcakes. Not everyone is a fan of mint and chocolate mixed together but this combination was pretty tasty and mildly addicting!!

Wednesday, October 12, 2011

Strawberry Champagne Cupcakes

My wonderful girlfriend/bride-to-be, Liz, is getting married at the end of the month. EEEK!!

I'm so excited to be part of the wedding party as a bridesmaid, and she was also one of my bridesmaids at my wedding, too. Recently we held a bridal shower at her parents house put together by the awesome maid of honor/older sister, Carmen, and the awesome bridesmaids. Our bridal shower theme was a "champagne celebration" with lots of mimosas, finger foods, and these beautiful strawberry champagne cupcakes. We had a fabulous time playing bridal shower games of groom trivia, bouquet toss game, and bridal mad-libs made from Liz's most said phrases when she opened her gifts.

I absolutely love baking cupcakes for any special occasion. Cupcakes are the essential party treat and I have saved dozens of recipes that I have been wanting to bake up. I knew that this would be the perfect cupcake to enjoy for the bridal shower and went well with the champagne theme. These strawberry champagne cupcakes were a hit with everyone at the party. They loved the luscious strawberry champagne buttercream on top, and the cupcakes so soft and fluffy. They were so pretty in pink, you couldn't help but smile as you bit into them. Simply sweet.

Congrats to the beautiful bride-to-be, Liz. You're going to be one stunning bride!

Strawberry Champagne Cupcakes
Adapted from
Cook like a Champion
Printable Recipe
Ingredients:
Strawberry Cake:
Strawberry Puree: 24 ounces frozen strawberries, thawed
Cake:
¾ cup strawberry puree, room temperature
¼ cup milk, room temperature
1 ½ ounces Strawberry Jello
6 large egg whites, room temperature
1 tablespoon vanilla extract
2 ¼ cup cake flour, sifted
1 ¾ cup sugar
4 teaspoons baking powder
1 teaspoon salt
12 tablespoons unsalted butter, (1 ½ sticks), room temperature

Champagne Buttercream Frosting:
1 cup plus 1 tablespoon champagne, prosecco or other sparkling wine
2 sticks (1 cup) butter, room temperature
2 ½ cups confections sugar
3 or 4 tablespoons of strawberry puree

Preparation:

Prepare the strawberry puree by placing a fine mesh strainer over a large bowl to remove any liquid. Save liquid for another use or discard. Place the strawberries in a blender and puree until liquid. Set aside ¾ cup for the cake and a couple tablespoons for the frosting. Use remainder of strawberry puree for anything else if desired.

Preheat the oven to 350 degrees. Add the desired cupcake liners to your muffin pans.

In a small bowl, mix together the strawberry puree, strawberry jello, milk, egg whites, and vanilla. In the bowl of the stand mixer, add the flour, sugar, baking powder, and salt and mix on low speed. Add the butter in small sections and continue mixing until the mixture resembles coarse sand. Add the strawberry mixture and mix on medium speed until smooth, scraping down the sides and the bottom of the bowl as needed.

Scoop about ¼ cup of batter into the muffin pans and bake cupcakes for 20 to 22 minutes, or until slightly puffed and slightly (strawberry) golden. Cool cupcakes in pans for 10 minutes, and remove to cooling rack. Once cupcakes have completely cooled, garnish with champagne buttercream.

Champagne Buttercream Prep:

Place 1 cup of champagne in a small saucepan over medium high heat and let reduce for about 10 minutes. The champagne will be syrupy and reduced down to about 2 tablespoons. Set aside and let cool.

In the bowl of the stand mixer, cream the butter and sugar until light and fluffy. Cream the butter until the frosting is thick. Add a couple tablespoons of the strawberry puree and reduced champagne and the reserved tablespoon of champagne and mix until fully combined.

Place the champagne buttercream frosting into a pastry bag fitted with desired decorative tip (I used a large star tip). Frost the cupcakes and garnish with pink sanding sugar as desired.

Yield: 28 to 30 cupcakes


Review: These pretty tasty cupcakes went quickly and my only problem that happened was that I forgot to set aside one for my number one taste tester, my husband! He was slightly bummed that he didn't get to taste these beauties. He saw the prepwork and the sweet smell of strawberries lingered in the house was a tease to him..it just means that I have to make them again. I never need an excuse to bake something sweet!

Friday, May 6, 2011

Hummingbird Cupcakes with Pineapple Flowers

Do you want to tell someone special in your life that you love them from the bottom of your heart? How about bake up something sweet and totally irresistible for your wonderful mother, awesome girlfriends, or nutty but loveable sisters? (Mother’s day alert!) Please do your mother, girlfriends, sisters or those lovely ladies in your life a favor and I highly suggest that you make these captivating cupcakes for them. They will melt like butter in your hands. Trust me. These hummingbird cupcakes are absolutely gorgeous and a sinful treat that they will truly enjoy and appreciate.

Hummingbird Cupcakes

Hummingbird cupcakes are a typical Southern dessert that’s been around for ages, and I recently had tasted one from Magnolia Bakery in Los Angeles. It was reminiscent of banana bread with sweet bits of pineapple and the hard to resist cream cheese frosting. I fell in love with the simple doctored up version of nutty banana bread and had to recreate it at home. The dried pineapple flowers garnished on top are a must-do if you are looking for that extra wow factor. I made a big batch of these cupcakes for my coworker’s birthday and shared a bunch of them with some special ladies in my life. 

Simply scrumptious and equally exquisite for all those wonderful ladies. Happy (early) Mother’s day!

Hummingbird Cupcakes2

Hummingbird Cupcakes with Pineapple Flowers
Adapted from Annie’s Eats & Martha Stewart Cupcakes
Printable Recipe
Ingredients:
For the cupcakes:
3 cups all-purpose flour
1 teaspoon baking soda
½ teaspoon salt
1 teaspoon, ground cinnamon
12 tablespoons unsalted butter, melted and cooled
1 teaspoon vanilla extract
1 ½ cups sugar
3 large eggs
2 cups mashed ripe banana (3 large)
1 cup crushed pineapple, drained
1 cup chopped pecans toasted (optional)
⅔ cup unsweetened shredded coconut


For the frosting:
8 ounces cream cheese
6 tablespoons unsalted butter, at room temperature
1 teaspoon vanilla extract
2½ cups confectioners’ sugar, sifted


Preparation:


Preheat the oven to 350 degrees. Line cupcake pans with paper liners.


In a medium bowl, whisk together the flour, baking soda, salt and cinnamon. Set aside. In the bowl of the stand mixer, cream the butter, sugar and vanilla until light and fluffy. Slowly add the eggs one at a time, and mix until fully combined. Add in the mashed bananas. Mix the dry ingredients with the wet ingredients on low speed until combined. Fold in the crushed pineapples, pecans and coconut with a spatula until evenly mixed.


Scoop about ½ cup of batter or less in the prepared liners. Bake for 20 to 22 minutes, or until a toothpick inserted in the middle comes out clean. Let the cupcakes cool in the pans for 5 to 10 minutes before transferring to cooling rack. Let cupcakes cool entirely before frosting.


Prepare the frosting: In the bowl of the stand mixer, cream the cream cheese and butter on medium speed until well combined and smooth. Add the vanilla extract and slowly add the confectioners’ sugar until fully combined. Frost cupcakes as desired.

Optional: Garnish with pineapple flowers or use chopped pecans.

Dried Pineapples Flowers


Dried Pineapple Flowers:
1 to 2 large pineapples, peeled


Preparation


Preheat the oven to 250 degrees. Line two baking sheets with baking mat or parchment paper.
Using the end of vegetable peeler, remove and discard pineapple “eyes.” Using a large sharp knife, slice pineapple crosswise into very thin slices. Transfer slices to prepared baking sheets.


Bake until slices slightly dry, the edges slightly curl. Flip the slices and bake the other side until almost dry. Carefully place the flower in a small muffin pan to form the shape of flowers. Let them sit out overnight and garnish on cupcakes when ready to serve.

Hummingbird Cupcakes 3

Review: One of the best cupcakes that I have made in long time. They are moist and not too sweet and leave that lasting pineapple scent with you. I’m a big fan of red velvet cupcakes so I have officially fallen in love with this one. It has such a quirky and amusing name because someone even asked me if there are real hummingbirds in the recipe. I laughed and said no but they do sing “eat me now!” Something magical about these cupcakes brought a giant smile to everyone’s faces, the smell of the roasted pineapple flower was intoxicating and the overall presentation was truly unique.

Friday, February 25, 2011

Red Velvet Cupcakes

Red velvet cupcakes. I like they way they sound as they roll off my tongue, it’s sounds so sexy and chic. I also love the way a red velvet cupcake tastes with the slight hint of chocolate topped with a luscious butter-y cream cheese frosting.  Yum and yum.  I absolutely love red velvet cupcakes because of their rich and deep flavor, it isn’t too sweet and they taste the way they look - like red velvet cupcakes!

There is something wonderful and absolutely perfect about red velvet cupcakes because it’s the quintessential treat to have for birthday parties. I love the bright vivid color of them, they make me squeal in delight, and the perfect beauties to make at any time. My little cousin turned the big ole 5 years old, and I had brought these beauties in to celebrate her big day. Cupcakes and birthday parties go hand and hand and my uncle and aunt had plenty of delicious foods and not to many desserts so I was happy to bake something up. My little cousins, nieces and nephew were quickly asking me if they could have one and gobbled them right up.

These cupcakes turned out soft and moist and the cream cheese frosting is light, airy and has just the right amount of cream cheese sweetness topped with a red candy bit. Enjoy a cupcake or two!

Red Velvet Cupcakes 2-1

Red Velvet Cupcakes
Adapted from Barefoot Contessa How Easy is That
Printable Recipe
Ingredients:
2 ½ cups all-purpose flour
¼ cup unsweetened cocoa powder
1 teaspoon baking powder
1 teaspoon baking soda
1 teaspoon kosher salt
1 cup buttermilk
1 tablespoon liquid red food coloring or (1 teaspoon red gel food coloring)
1 teaspoon white vinegar
1 teaspoon vanilla extract
8 tablespoons (1 stick) unsalted butter, room temperature
1 ½  cups sugar
2 large eggs, room temperature
Cream Cheese Frosting:
8 ounce cream cheese, at room temperature
1 ½ sticks unsalted butter at room temperature
½ teaspoon vanilla extract
3 ½ cups sifted confectioners (powdered) sugar


Preparation:


Preheat oven to 350 degrees.  Line muffin tins with paper liners.


In a medium bowl, whisk together the flour, cocoa powder, baking powder, baking soda and salt.  In a small Pyrex cup (2 cups) whisk together the buttermilk, food coloring or gel, vinegar and vanilla.

In the bowl of a stand mixer fitted with the paddle attachment, cream the butter and sugar on medium speed until light and fluffy. Slowly add the eggs one at a time, making sure that is fully combined.  With the mixer on low speed, alternately add the dry ingredients and wet ingredients to the bowl, beginning and and ending with the dry ingredients (dry, wet, dry, wet, dry).  Mix until fully combined.

Divide the batter evenly among the prepared liners. Bake for 25-30 minutes, or until a toothpick inserted in the center of a cupcake comes out clean.

Prepare the frosting and add the cream cheese, butter and vanilla in the bowl of an stand mixer fitted with the paddle attachment and mix on medium speed just until combined.  Add the sugar and mix until smooth.

Using a pastry bag with desired piping tip, add the cream cheese frosting into the bag. Carefully top each cupcake with a swirl of cream cheese frosting. Red Velvet Cupcakes 3

Review: Sinfully delicious!

Friday, February 11, 2011

Mojito Cupcakes

Mojito. Mmmmmm.

It’s a classic Cuban cocktail to order if you are out at a restaurant. It’s a great starter drink if you are unsure what to order from all the mixed cocktails. I still remember the first time I had my first mojito. It tasted like freshly made limeade with a hint of mint and a whole lotta rum. LOTS of RUM. You could barely taste the rum that we made batches after batches of mojitos and we had a barrel of fun the entire day. They were so refreshing with a little bit of a kick that I wanted something reminiscent in a sweet treat for our Superbowl party like a mocktail dessert. Boozy cupcakes, oh heck yes.

I knew these would be perfect little bites of tropical heaven to enjoy after feasting on tacos de carnitas. Finger foods require easy finger desserts right? You get a slight hint of the rum paired with the simple vanilla cupcake. If you wanted to taste more alcohol, I suggest poking the tops of the cupcakes and add a glaze of rum before adding the frosting. I have bought a ton of cupcake liners from Bake it Pretty and used the green and yellow flower ones for my husband’s team. Or if you don't want to use alcohol at all just use vanilla extact. Everyone had loved these cupcakes and were slightly intoxicated…by the name. Cheers!
Mojito Cupcakes2-1 
Mojito Cupcakes
Adapted from The Boozy Baker
Printable Recipe
Ingredients:2 ½ cups all-purpose flour
2 teaspoons baking powder
¼ teaspoon salt
12 tablespoons (1 ½ sticks) unsalted butter, room temperature
1 ½ cups sugar
2 large eggs
1 teaspoon vanilla
1 teaspoon dark rum
1 ¼ cups buttermilk
2 to 3 sprigs of mint (garnishment)
lime slices (cut really small and thin for garnishment)
Lime Cream Cheese Frosting:8 ounces (1 bar) cream cheese, room temperature
3 cups powdered sugar
2 teaspoons dark rum
4 tablespoons (½ stick) unsalted butter, room temperature
1 tablespoon lime zest, about 2 limes
1 tablespoon lime juice

Preparation:

Preheat the oven to 375 degrees. Line two cupcake pans with desired paper liners and set aside.


In a large bowl, whisk together the flour, baking powder and salt.

In the bowl of the stand mixer, cream the butter and sugar until light and fluffy on medium speed. Slowly add the eggs one at a time and then add vanilla & rum.

Slowly incorporate the flour and milk mixture to the butter mixture in alternate additions. Adding ⅓ of batter, then ⅓ milk at time.  Mix until combined.

Add about ⅔ cup of batter to the cupcake pans. Bake for 18 to 20 minutes, or until golden brown. Remove and place on cooling rack. Frost with Lime Cream cheese frosting. Add a mint leaf and a slice of lime to garnish.

Make the frosting:
In the bowl of the stand mixer, cream the butter, sugar and cream cheese together until combined. Add the lime zest, lime juice, and rum. Mix until combined.
Mojito Cupcakes
Review: Absolutely scrumptious. I know these mojito cupcakes are not as good as the real thing, but I dare you to go ahead and make the cocktail to pair with the dessert. I would have to say what time shall I come over? Mojito cupcakes and mojitos seem like a match made in eat/drink heaven. I’m inspired to make more boozy cupcakes in other drink flavors. The possibilities are endless….cosmopolitans, sangria, Irish car bombs, and so many more.

Tuesday, May 25, 2010

Chocolate Cupcakes & Peanut Butter Frosting

I couldn't make sweets just for my office, so I made sweets for Eric's office, too. I was super busy in the kitchen, and just finished making the Candy Bar Blondies. I had leftover buttermilk and sour cream that I had to use before it expired and that's how it lead me to this recipe....and from the very fact that Chocolate Cupcakes with Peanut Butter Frosting would make anyone fall in love with you! I think that's enough explanation about why I made these, and they were soooooo good. They are kinda too sweet for my taste, it took me two days to finish one. I ate 1/2 of the cupcake yesterday and the other 1/2 today - I stretched out the wonderful goodness of it, too! Enjoy!


Chocolate Cupcakes & Peanut Butter Icing
Adapted from Barefoot Contessa at Home
Ingredients:
1 ½ sticks unsalted butter, room temperature
2/3 cup granulated sugar
2/3 cup light brown sugar, packed
2 large eggs, room temperature
2 teaspoons vanilla extract
1 cup buttermilk, shaken, room temperature
2 tablespoons brewed coffee
1 3/4 cups all-purpose flour
1 cup good cocoa powder
1 ½ teaspoons baking soda
½ teaspoon kosher salt
1 cup chopped salted peanuts (optional)
Kathleen's Peanut Butter Icing (see below)

Preparation:
1. Preheat the oven to 350° and line the cupcake pans with the liners.
2. Cream the butter and two sugars on high speed in the KA mixer with the paddle attachment. Cream until it's light and fluffy - about 5 minutes. Lower the speed to medium, add the eggs one at a time, add the vanilla and mix well.
3. In a medium bowl, add the buttermilk, sour cream and coffee and mix well. In a large bowl, sift together the flour, cocoa powder, baking soda, and salt.
4. Turn the KA mixer on low, add the buttermilk mixture and flour mixture alternatively in thirds into the bowl, using the buttermilk mixture first and then the flour mixture. Mix until blended. Add the salted peanuts and fold the batter in to make sure it's completely blended in.
5. Add an ice cream scoop or 1/3 cup of batter into the cupcake pans. Bake in the oven for 20 to 25 minutes, or until a toothpick comes out clean. Cool for 10 minutes , remove from the pans, and allow to cool completely before frosting.
6. Frost each cupcake with peanut butter icing.

Kathleen's Peanut Butter Icing
1 cup confectioners' sugar
1 cup creamy peanut butter
5 tablespoons unsalted butter, room temperature
3/4 teaspoon vanilla extract
1/4 teaspoon kosher salt
1/3 heavy cream
--Place all the ingredients except the heavy cream into the KA mixer and mix on medium-low speed until creamy, make sure to get the sides of the bowl with a rubber spatula. Slowly add the cream and beat on high speed until the frosting is light and smooth.

Review: Mmmmm, this tasted like you were eating a baked Reese's Peanut butter cup...it was a chocolate & peanut butter lover's heaven! (That's a mouthful!) I think the cupcakes are perfectly fine by themselves without the frosting, but the peanut butter frosting definitely kicks it up an sweet notch.

Monday, March 29, 2010

Elmo Cupcakes

My niece and nephew just turned 3 this past weekend, and as a special request from my youngest sister - I had made Elmo cupcakes. Last year, I made them babycakes - little mini cupcakes. Cupcakes are the quintessential birthday dessert right? The twins absolutely love Elmo, he's got this lovable laugh and is universally recognizable to any little toddler. I figured these would be a nice addition to their birthday party, and fun for the little kids to eat as well. Use a frosting that will hold shape well, the buttercream recipe that I used did not take well to my spiking efforts.


Easy Assembly:
Cupcakes - I used strawberry & devils food
Red frosting of your choice or white frosting and color it with Wilton Red Icing Paste
Wilton White Candy Melts
Oreos - cut them in half to make mouths
Orange marshmallows to make nose - cheapest kid friendly ORANGE candy that I could find. I wasn't going to buy gumballs for little 3 year olds to eat. Orange gumballs look better as the nose.
Wilton Black Sparkle Gel
Directions:
1. Bake your cupcakes as directed and let cool to room temperature.
2. Prepare the mouths, split Oreos into halves, eat broken ones if you want.
3. Prepare the eyes, add a little black gel to the white candy melts.
4. Frost the cupcakes, spike it up with a fork to create a feather look. It would have worked better if I had piped the frosting.
5. Assemble the cupcakes, add the eyes, marshmallow noses, and Oreo mouths. Presto...you got Elmo!
Happy Birthday Anastaisha and Jerricko, hope you had a fantastic birthday! I'll always think of you as two little monsters crawling around.

Stop growing already!

Monday, November 2, 2009

Red Velvet Cupcakes

I've made these cupcakes a couple times before and knew it would be the perfect cupcake for the Halloween themed treats I wanted to do. I'm not big on Halloween, but I wanted to do something fun and whimsical for us "big kids." Paula's Deen recipe is my go-to for Red Velvet cupcakes because they have turned out moist and perfect every time. This is really a simple and easy recipe that does not take alot of time. Enjoy!


Red Velvet Cupcakes with Cream Cheese Frosting
Adapted by Paula Deen
Eyeball cupcakes seen on Annie's Eats
Ingredients:
2 1/2 cups all-purpose flour
1 1/2 cups sugar
1 teaspoon baking soda
1 teaspoon salt
1 teaspoon cocoa powder
1 cup vegetable oil
1/2 cup applesauce
1 cup buttermilk, room temperature
2 large eggs, room temperature
2 tablespoons red food coloring
1 teaspoon white distilled vinegar
1 teaspoon vanilla extract

For the Cream Cheese Frosting:
1 pound cream cheese, softened
2 sticks butter, softened
1 teaspoon vanilla extract
4 cups sifted confectioners' sugar

Eyeballs - M&Ms, Gummi Lifesavers, red frosting

Directions:
1. Preheat the oven to 350 degrees F. Line 2 (12-cup) muffin pans with cupcake papers.
2. In a medium mixing bowl, sift together the flour, sugar, baking soda, salt, and cocoa powder. In a large bowl gently beat together the oil, buttermilk, eggs, food coloring, vinegar, and vanilla with a handheld electric mixer. Add the sifted dry ingredients to the wet and mix until smooth and thoroughly combined.
3. Divide the batter evenly among the cupcake tins about 2/3 filled. Bake in oven for about 20 to 22 minutes, turning the pans once, half way through. Test the cupcakes with a toothpick for doneness. Remove from oven and cool completely before frosting.
4. For the Cream Cheese Frosting:
In a large mixing bowl, beat the cream cheese, butter and vanilla together until smooth. Add the sugar and on low speed, beat until incorporated. Increase the speed to high and mix until very light and fluffy.

*Eyeball Cupcakes -
To decorate the cupcakes, frost liberally with cream cheese frosting. Tint remaining frosting with red food coloring to desired shade. Place a Gummy Saver in the center of each cupcake. Using a pastry bag, pipe a small amount of frosting into the hole in the center of each Gummy Saver. Place a black M&M candy (logo down) in the center of each Gummy Saver and press down to adhere to frosting. Pipe squiggly lines of red frosting radiating out from around each Gummy Saver to create vessels.

Review: This is one of my favorite cupcakes, and Paula Deen's recipe is the best I have used. The eyeball cupcakes were a fun treat for our Halloween dinner party.

Friday, April 3, 2009

Baby food & cake?

My niece and nephew finally turned 2 this past weekend, and for their birthday dinner I had made spaghetti & meatballs *any kids favorite meal!* and babycakes. It's like a mini-version of a cupcake, so adorable and perfect for a little person, I mean a kid! I frequently watch the Foodnetwork, and saw the episode where the contestants made the Ultimate dessert. I was really interested in the Babycakes because it used baby food as an ingredient. The idea of eating baby food kinda grossed me out, but it's similar to using pumpkin puree or applesauce. Besides the Earth's Best baby food I had used was organic and has the nutrients and vitamins, so it was a great pick for the kids. The babycakes turned out to be sweet and moist. I did end up making some regular size cupcakes for us adults, and the kids happily enjoyed their babycakes!
Adapted from Lisa Roman
From the show on Foodnetwork: Ultimate Recipe Showdown: Desserts
Cupcake Batter Ingredients:
1/2 teaspoon baking soda
1 teaspoon salt
1 1/2 teaspoons double-acting baking powder
2 1/4 cups all-purpose flour
3 eggs
1/4 cup clover honey
1/2 cup light brown sugar
3/4 cup granulated sugar
3/4 cup unsalted butter, softened
2 teaspoons ground cinnamon
1 (4-ounce) jar pumpkins with pears baby food (recommended: Nature's Goodness brand)
2 (4-ounce) jars applesauce and apricots baby food (recommended: Earth's Best brand)
1/2 cup ground pecans
**I couldn't find the exact match for applesauce & apricots, so I improvised and used the ones below: 2 of Apples & Apricots, 1 of Pears**
Frosting Ingredients:
1 teaspoon almond extract **I didn't have any, so I used lemon extract**
2 teaspoons vanilla extract
4 tablespoons sweetened condensed milk **I didn't have any, so I used the leftover Coco Lopez*
4 ounces cream cheese, softened
3/4 cup unsalted butter, softened
1 1/4 cups powdered sugar
1/4 cup ground pecans *I omitted these, and used sprinkles.*
Special equipment: 2 (12-cup) mini muffin pans

Cupcakes:
Directions
1. Preheat the oven to 350 degrees F.
2. In a small mixing bowl add the baking soda, salt, baking powder and flour. Mix thoroughly with a fork and set aside.
3. In a large mixing bowl add the eggs, honey, both sugars and butter. Mix until smooth using a hand mixer. Add the cinnamon and baby food. Mix until smooth. Using a rubber spatula fold in the pecans. Slowly add the flour mixture using a sifter and fold in until ingredients are evenly mixed.
4. Place 24 mini baking cups (2-inch, nonfoil) into each hole of the mini muffin pan. Place a 1-gallon resealable freezer bag into a bowl (for support) and pour the cupcake batter into the bag. Seal the bag and cut the tip off 1 of the bottom corners of the bag. Squeeze the batter into each baking cup, filling them only 3/4 of the way full. Place the mini muffin pan in the oven on the center rack.
5. Bake for 12 minutes.
Frosting:
1. In a small mixing bowl add the extracts, milk, cream cheese, butter and powdered sugar. Mix until smooth and creamy using a hand mixer. When the cupcakes are done baking remove each cupcake from the pan and place on a cooling rack. Place the cooling rack in the refrigerator for 5 to 7 minutes.
2. Once the cupcakes are cooled remove them from the refrigerator. Frost each cupcake by putting a generous dollop of frosting on the top with a spoon. Garnish top with ground pecans and they are ready to serve.

Happy Birthday Jerricko and Anastaschia!

Monday, March 9, 2009

Carrots are good for you!

Spring is almost here, and I'm really excited because there are lots of things I have planned for this month. We will be planting our herb garden, add some flowers to the front yard of our house, and work on our gardening skills. One of my favorite spring desserts is carrot cake. I love the flavors of carrot cake because it's so moist and fresh, it always brings a smile to my face! I knew I had to try this cupcake recipe from Williams-Sonoma because it was the perfect bite of sweetness that I was looking for. I would add some walnuts for more texture, but it truly was a sweet treat!

Carrot Cupcakes with Mascarpone Frosting
Adapted: Williams-Sonoma


Ingredients:
1/3 cup butter, at room temperature
3/4 cup granulated sugar
1 Tbs. maple syrup or honey *I used honey.
1 Tbs. finely grated orange zest
2 eggs
1 cup grated carrot
1 cup plus 2 Tbs. all-purpose flour
2 tsp. baking powder
7 Tbs. fresh orange juice, warmed
1 tsp. baking soda
For the mascarpone icing:
6 Tbs. (3/4 stick) unsalted butter, at room temperature
1 1/2 cups confectioners’ sugar
1 tsp. grated lemon zest
4 oz. cold mascarpone or low-fat cream cheese
Strips of dried mango for garnish (optional)

Directions:
1.Preheat an oven to 350°F. Line 10 standard muffin cups with paper liners.
2. In the bowl of an electric mixer, beat together the butter, granulated sugar, maple syrup and orange zest until pale and creamy. Beat in the eggs one at a time. Stir in the carrot.
3. In a bowl, sift together the flour and baking powder. In another small bowl, stir together the orange juice and baking soda.
4. Stir the flour mixture into the butter mixture in two additions, alternating with the orange juice mixture in two additions until smooth. Do not overbeat or the cupcakes will be tough.
5. Spoon the batter into the prepared muffin cups.
6. Bake until the cupcakes are risen and lightly golden, about 20 minutes.
7. Transfer the pan to a wire rack and let the cupcakes cool for 10 minutes, then turn them out onto a baking sheet and let cool completely, about 1 hour.
8. To make the mascarpone icing, in the bowl of an electric mixer, beat together the butter and confectioners sugar until light and fluffy. Stir in the lemon zest and mascarpone until blended. When the cupcakes are cool, frost them and garnish with strips of dried mango. Cupcakes may be stored in an airtight container for up to 3 days. Makes 10 cupcakes.

Adapted from New Healthy Kitchen Series, Desserts, by Annabel Langbein (Simon & Schuster, 2006).
**I'm sharing these cupcakes with a girlfriend, I can't leave these all at home to eat for Eric and me!!**
Pin It button on image hover