Mrs. Regueiro's Plate: Appetizers
Showing posts with label Appetizers. Show all posts

Monday, August 26, 2013

Pot of Gold: Jessica's Virtual Baby Shower

It's time for a virtual party! A virtual party is when a group of blogger friends choose a day to write a post to celebrate such a blessing in their life. It's one way to shower their friend with love and it is a special way to share the dishes that we might be enjoying if we were all together in real life. The hardest part of the virtual party is that most of us all live far away from each other but that doesn't stop us from showering our friends with love.
Today Jessica of My Baking Heart and I are co-hosting a baby shower for Jessica of Sunny Side Up. She is expecting her first baby anytime now - a sweet baby girl! As you may know if you don't already, Jessica and Jesse have named their sweet daughter, Maeve. It comes from Irish descent and Jessica absolutely loves Irish dancing. Jessica and I wanted to do a little Irish jig (if we could) to celebrate and help welcome her little bundle of joy Irish style, so we came up with the perfect theme - Pot of Gold!

Jessica is a dear friend to me who I had met a couple years ago on a cooking board and we actually met in real life at a food blogger conference and also have had a couple meet-ups afterwards as well. We have been friends ever since and I have been slowly waiting for the day for her to become a mommy. Jessica is pretty awesome with kids (she was a part-time nanny), cooks and bakes yummy and delicious foods like this incredible Tuxedo Layered Cheesecake or one of favorite meals Spicy, Sticky, Sweet Asian Meatballs and is a very thoughtful and caring friend and her down to earth charm is infectious. She is one of my all-time favorite bloggers that continues to inspire me and a true sweetheart of a friend. I know that Jessica is going to be one fantastic mommy and will shower her little pot of gold with so much love.

To celebrate Jessica's Pot of Gold baby shower, Jessica and I have gathered a fabulous group of Jessica's favorite bloggers for a virtual shower. Everyone has prepared plenty of delicious treats and mouthwatering eats for this wonderful Pot of Gold virtual baby shower.

First up, Katie of So Tasty, So Yummy baked a Chocolate Guinness Cake. Chocolate and beer in a cake? This scrumptious sweet treat is a must for any Irish celebration if you ask me. Pure genius (Guinness).
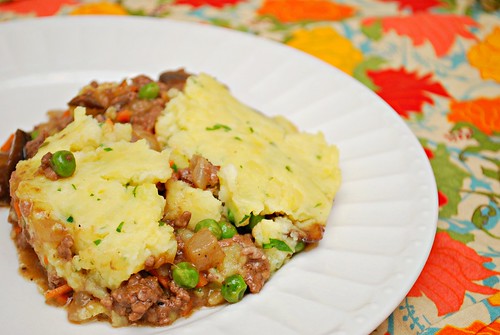
A fellow friend of ours, Joelen of What's Cooking Chicago made a tasty Shepard's Pie. This is a staple in Irish cooking and definitely a meat pie that we would all enjoy. Highly satisfying!
Next up, Amber of Sugared Whisk made these fantastic Irish Egg Rolls. These tasty and filling appetizers are a perfect alternative to the typical corned beef and cabbage. Heck yes!
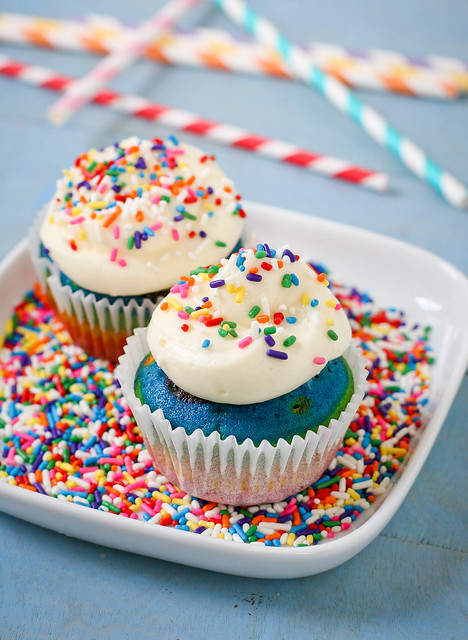
Krissy of Dainty Chef baked up these gorgeous Rainbow Cupcakes. These colorful rainbow cupcakes are perfect for this Irish celebration because they are fun to make and eat as well. It's like eating all the colors of the rainbow!
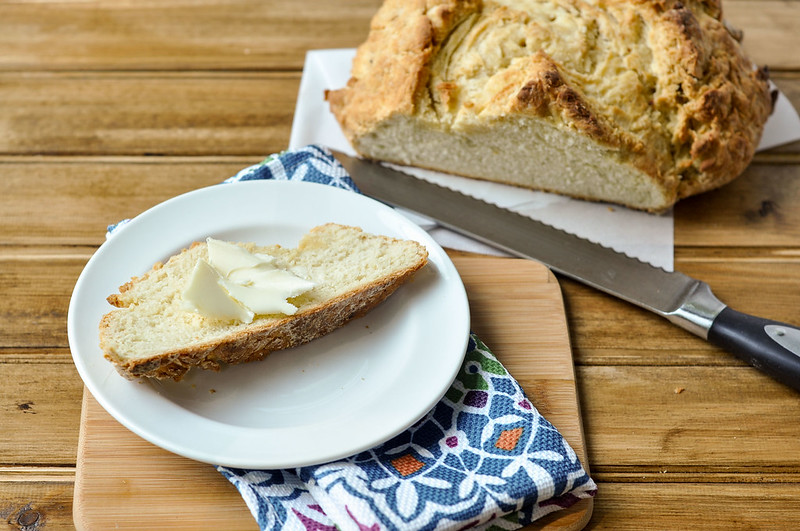
Rachel of Good Thymes and Good Food baked up one of my favorite dishes that I love to indulge on of Irish Soda Bread. This Irish classic is best when served warm with good butter, especially Irish butter if you can find it.
Kelsey of Apple a Day baked up a batch of some savory Irish Cheddar Scones. These scones are the perfect Irish indulgence - cheesy and buttery carb-y heaven. Yes please!
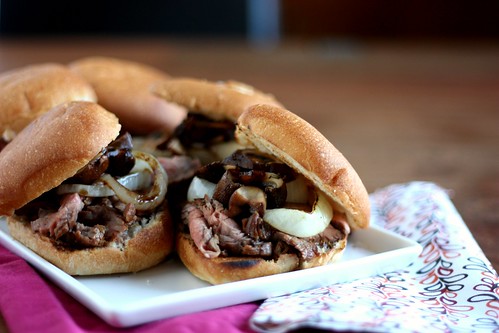
Elly of Elly Says Opa made a tray of Steak and Guinness Sandwiches. This fancypants steak sandwich is a beautiful marriage of beef and Guinness. Can I have a tray of these right now?
Nikki of Seeded at the Table made this gorgeous End of the Rainbow Fruit Salad. This End of the Rainbow Fruit Salad is the first book in a series of kids cooking-related books from the Kitchen Club kids. Kid-friendly recipes are a must for any future baby foodie! Smart thinking mommy Nikki!
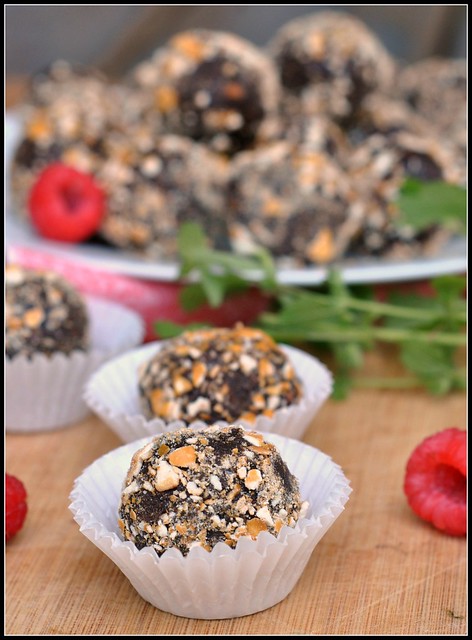
Another mutual friend of ours, Nicole of Prevention RD, made these irresistible Guinness and Pretzel Truffles. I have to get my hands on some Guinness and try these suckers out because they sound ahhh-mazing!

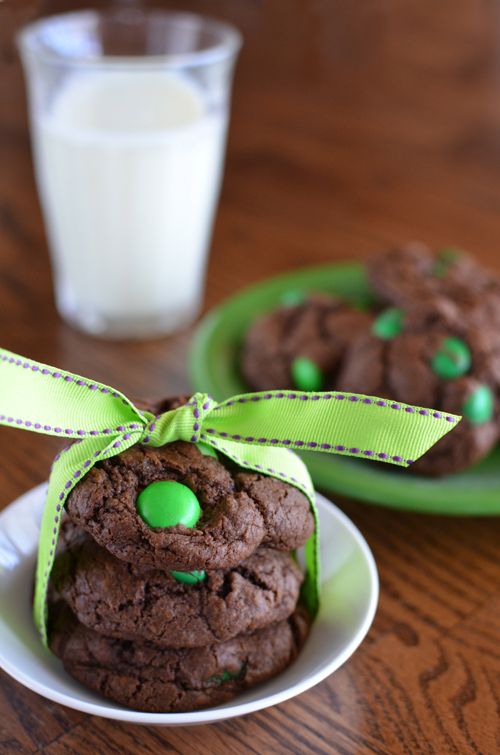
Jessica my fellow co-host of My Baking Heart made Chocolate Mint M&M Cookies. Jessica must have been on the same cooking mindset as myself because I used Mint M&Ms in my recipe as well. Any M&M cookie is a winner but this Chocolate Mint version will have you addicted!
Finally, for my own contribution, something that every pregnant woman wants/needs/must-haves are the perfect icy cold sweet treat - Shamrock Ice Cream. You always need to wear green for St. Patrick's Day to avoid getting pinched and I wanted to make something that was green enough to eat! I was inspired from Suzanne to make a batch of Shamrock Ice Cream. It's funny but I have been on an ice cream making kick lately, and I'm not even pregnant! My adaptation has mint Oreos and mint M&Ms making it the ultimate minty green concoction.

Shamrock Ice Cream
Adapted from The Perfect Scoop & Inspired from Kokocooks

Yield: 1 pint
Ingredients
  • 1 cup whole milk
  • 2 cups heavy cream
  • 1/4 cup sugar
  • pinch of salt
  • 5 large egg yolks
  • 1/4 teaspoon mint extract
  • 1 cup crushed Mint Oreos
  • 1/2 cup Mint M&Ms
  • 1/8 teaspoon green coloring
Cooking Directions
  1. In a small saucepan, warm the milk, heavy cream, sugar and salt over medium heat. Bring to a slow simmer for about 10 minutes.
  2. In a medium bowl, whisk together the egg yolks. Slowly scoop 1 cup of the warmed milk liquid into the medium bowl and whisk constantly until the egg mixture has thickened slightly. Be careful to curdle the eggs with the hot milk, remove any cooked eggs if so.
  3. Stir the whisked egg mixture back into the pot and stir the mixture together with a heatproof spatula over medium heat. It will coat the spatula. Remove from heat and chill mixture thoroughly in the refrigerator.
  4. Prepare ice cream in your ice cream maker according to the manufacturer's instructions. Stir in the green coloring until the mixture is the desired shade of green. Fold in the crushed Oreos and mint M&Ms. Place in a freezer container and let it freeze for at least 4 hours before serving.
Thank you so much to Jessica my co-host and the rest of the shower contributors. It's too bad that we all live too far away and couldn't celebrate in real life because all of these dishes sound absolutely perfect. Please make sure you check out all the fabulous dishes and scrumptious treats for this adorable "Pot of Gold" virtual baby shower.

Congratulations to Jessica on your sweet Irish baby girl. Maeve is so lucky to have parents like you and Jesse! I wish you nothing but the best as you begin your journey as a family of three. The love that your sweet child will bring you and Jesse is one of the greatest gifts that you could ever ask for.

Tuesday, February 26, 2013

Ham Croquettes {Croquetas}

 
I can't believe this month is almost over and Easter is around the corner. Once all the Valentine's decorations were off the shelves from the stores, Easter basket galore, Cadbury eggs and marshmallow bunnies have filled it's spot. It's one of those weird years that Easter comes early, but it is a nice reminder that Spring is almost here, too. Actually this is my personal reminder that I need to work on our vegetable and herb garden, and Eric and I have some busy dirt-filled weekends ahead of us. Hopefully, we can plant some tomatoes, bell peppers, and a wide array of herbs. It's always nice to enjoy the fruits of your labor during the coming months of Spring and Summer.

These ham croquettes are commonly served at holiday parties like Easter as appetizers or can be consumed for any meal of the day. Breakfast, lunch or dinner, it doesn't matter or even as that perfect midnight snack. Typically, we enjoy them in a Cuban medianoche sandwich (sweet bread sandwich with pork and ham) with a croquette sandwiched in between, or most often by themselves. They are the perfect Cuban snack because once you start eating them, you can't stop. More importantly, it's an appetizer you can prepare using all that leftover Easter ham.

Thursday, September 6, 2012

Mini Honey Corn Dog Muffins

Sweet September is finally here. Pumpkin spice lattes, apple goodies, and football season are back!!

It's funny how certain foods can bring back sweet memories. When Eric and I were first dating like 11 years ago, Eric would prep a couple snacks for us whenever we were at his parent's house. Since we had awesome 20 year old metabolism back then. Snacks were usually quesadillas or corn dogs. It wasn't the fanciest of meals back then, but I appreciated my husband's attempt of preparing a snack.

When I saw this recipe, I knew that this would be a fun throwback on our favorite pastime snack. More importantly, it would be healthier than the frozen variety that we were used to and my 30 something metabolism will thank me for it, too. It was helpful that most of the ingredients were found in my pantry and it was an extra bonus that we had extra hot dogs to spare to use.  You never really buy the equal amount of hot dogs to hot dog buns. Or if you do, please share me your secret!

Sweet and savory bites of corn dog heaven.
Mini Honey Corn Dog Muffins
Adapted from The Jey of Cooking
ZipList Add Recipe

Thursday, April 19, 2012

Baked Tex-Mex Pimento Cheese Dip

Everyone's favorite question to ask me lately: What do you crave during your pregnancy?

I really don't have a solid answer to that. Eric hasn't made any late night trips to pick me up a pint of ice cream or go out searching for my favorite gourmet food truck. I haven't experienced any weird food combinations like pickles or anchovies either. However, my default answer has been milk. For some reason, my craving for milk satisfies all of cookie's needs. For breakfast, I usually eat about 2 bowls of cereal and that keeps me at bay until my mid-morning snack time. Later at night before I head to bed, I love a hot cup of milk. Funny thing, it's like clockwork every night because I know it's time to hit the bed when I feel cookie's kicks wanting his/her daily dose of milk. It's like the calming of the storm afterwards, and the kicks are gone after I have drank my glass of milk.

I can tell you that most often enough when I have been meal planning these past couple of weeks, I have been searching for quick and easy meals that are highly satisfying and comforting. A couple weeks ago, when we hosted Good Friday dinner. This easy to prepare Baked Tex-Mex Pimento cheese dip was comfort food at it's best. The simple combination of jalapeno-pepper, extra-sharp cheddar cheese with roasted bell peppers and jalapenos. It's a great combination of Tex-Mex and Southwestern, plus it's a bowl of cheesy delicious-ness that you can't stop dipping into.


Baked Tex-Mex Pimento Cheese Dip
Adapted from Pink Parsley
Printable Recipe
Ingredients:
1/2 cup mayonnaise
8 ounces cream cheese, softened to room temperature
1 cup chopped roasted red bell pepper, reserve 1 tablespoon for garnishment
2 jalapeno peppers, seeds and ribs removed, chopped finely
8 ounces extra sharp cheddar, grated (about 2 cups)
8 ounces Pepperjack cheese, grated
1/3 cup minced green onions, about 2 to 3 white and green parts
1/3 cup minced fresh cilantro
1 teaspoonWorcestershire sauce
1/4 teaspoon red pepper flakes (more or less to taste)
salt and pepper to taste
tortilla chips, for serving

Preparation:


Preheat the oven to 350 degrees and lightly grease a 2-quart baking dish.

In a large bowl, combine all the ingredients for the dip, reserving 1 tablespoon of each cheese for topping. Mix well with a spatula or wooden spoon. Adjust seasonings if necessary, and spoon mixture into the baking dish.

Top with the reserved cheese and bake 20-25 minutes, until hot and bubbly. Garnish with additional cilantro and diced red bell peppers if desired.

Serve immediately with tortilla chips.

Yield: 2 ½ cups

Review: It's a bowl of cheesy-goody-ness that you must make STAT! You might want to make two batches just in case it disappears before your eyes. Your family, friends and you will thank me later for it. ;-)

Tuesday, February 7, 2012

Fried Mac and Cheese Bites

Yesterday, I had the worst sugar high food hangover in my life. UGH. Plus, it wasn't even from the Superbowl bonanza foods that I enjoyed on Sunday either because it was from the glucose test drink that I had to endure yesterday morning. I had to fast before my scheduled appointment, which meant no breakfast, no cup of coffee, or no food in my stomach until after 10am. FAIL. After guzzling that sugary fizzy citrus drink, cookie was beating me up left and right. It felt like cookie was practicing baby zumba and boxing all at once.

The nurse finally took their samples, and I went my happy and hurriedly way to enjoy breakfast. But it was too late, my sugary buzz and growing 'need caffeine asap' headache was starting to grow. I spent most of my day in a uncomfortable sugary super high, and when I finally came home from work. I crashed hard, and stayed in bed and rested until dinnertime.

Luckily, we still had leftovers from Superbowl to enjoy for dinner. Nothing seemed appetizing though in my sugary daze, and I really wanted another platter of these savory fried mac and cheese bites. For my Superbowl party, I had re-purposed my leftover four cheese macaroni and cheese and made a tasty appetizer for everyone to enjoy. For a playful presentation, I bought these colorful serving forks in the dollar bin at Target. It was a delightful platter of smack-tastic bites for the eyes and the tummy.

Enjoy!

Fried Mac and Cheese Bites
Adapted from Alton Brown
Printable Recipe
Ingredients:
Leftover macaroni and cheese, refrigerated
1 cup all-purpose flour
1 teaspoon salt
1 teaspoon pepper
1 teaspoon cayenne
1 egg beaten with 2 teaspoons water
1 cup panko bread crumbs
Vegetable/Canola Oil for deep frying, preheated to 375 degrees

Preparation:

Prepare your deep fryer or large pot with vegetable/canola oil and heat to 375 degrees.

Scoop about 1/2 cup of macaroni and cheese, and form balls or you can cut into bite size pieces.

Set up three dipping and breading station containers: one dipping container for the seasoned flour of salt, pepper and cayenne pepper, one dipping container for the beaten eggs, and the final dipping container for the panko bread crumbs.

Dredge each ball of macaroni and cheese in the flour and remove the excess. Dip in the egg wash and coat with the bread crumbs. Allow them to rest for 5 minutes so the crust can set.

Very carefully drop a couple of the macaroni balls into the oil and fry until golden brown. Remove and place on a paper-lined baking sheet. Let it rest for 5 minutes until ready to serve. Place on serving platters.

Serve with a side of buttermilk ranch dressing.

Yield: 16 to 20 bites (depending on your macaroni and cheese leftovers)

Review: Absolutely delicious, and who can say no to macaroni and cheese? No one. Plus, it was super easy to prepare especially since I had a deep fryer, and it makes less of a mess in the kitchen because I fry everything out on the patio. I have this tiny Cuisinart that we received from our wedding registry and it really does the trick whenever you need a couple things deep fried. My little growing cookie sure loves his/her savory foods like this and I'll be twiddling my thumbs all week long until I find out the results of my glucose test next week.
Pin It

Wednesday, January 25, 2012

Soft Pretzel Bites

Lately, I have been craving salty foods more than normal. I guess my pregnancy cravings are starting to really pick up and I'm trying my absolute best to stick to eating healthy, exercising and providing nutritious foods for my growing belly. Can you believe that I'm 25 weeks today? For those that are curious, Eric and I aren't finding out the gender of the baby aka cookie. We want our little blessing a surprise come May. My pregnancy cravings haven't been pickles and ice cream or anything weird, but more salty and sour.

I had recently met up with Jessica from Sunny Side Up In San Diego and she had given me some ideas on my birthday cake that I plan on baking next month. I wanted to highlight something from her blog and I fell in love with from her recipe post on soft pretzel bites and a couple other recipes, too.

It's like my pregnancy cravings were instantly honed on her soft pretzel bites. These soft pretzel bites are easy enough for the immediate cook because I have conquered my fear with yeast a couple times in the kitchen. Yeast may have won more battles (failed recipes), but this might pose a little challenge if this is your first attempt with yeast. (Make sure to give yourself some ample time to let the dough rise). Be careful because these little pretzel bites might be addicting, and you can easily make sweet ones by substituting cinnamon sugar instead of coarse salt for the topping. It's a carb lovers dream come true!

Paired beautifully with my buffalo chicken soup, or make Jessica's beer cheese dip.
Soft Pretzel Bites
Adapted from Sunny Side Up in San Diego
Printable Recipe
Ingredients:
Pretzel Dough:
4 teaspoon active dry yeast
1 teaspoon white sugar
1 1/4 cups warm water (110 degrees F/45 degrees C)
5 cups all-purpose flour
1/4 cup white sugar
1/4 cup brown sugar
1 1/2 teaspoon salt
2 Tbsp butter, melted
Topping:1/2 cup baking soda
4 cups hot water
2 egg whites
2 tablespoon butter, melted and cooled
Coarse kosher salt, for topping
Parchment paper and cooking spray

Preparation:

In a measuring cup, dissolve the yeast and 1 teaspoon sugar in warm water. Set aside. (Mixture should become foamy - or you have bad yeast or too hot water).

In the bowl of a standing mixture fitted with a dough hook, combine the flour, sugars, and salt on low speed. Turn off the mixer and pour the water/yeast mixture and melted butter into the bowl. Turn the mixer on and knead for 6 to 8 minutes until the dough is smooth. If the dough is too dry you can add extra water, a tablespoon at a time.

Lightly oil a large bowl. Remove the dough from the mixer and shape into a ball. Place the dough ball in the bowl, cover with a clean towel, and allow to rise for one hour (or until double in size).
Note:*I turn on my oven at the lowest temp at 200 while I am doing my food prep. Then I place the bowl in the oven, and turn off the oven with the door slightly open for 30 minutes, then remove it and place on top of the oven for the remainder of the rising time.*

Towards the end of rising time, preheat oven to 450 degrees and prepare baking sheets with parchment paper and cooking spray. In a large bowl, combine the hot water and baking soda. In a small bowl, whisk together the egg whites and melted butter.

After the dough has risen, punch down the dough and then knead with hands for one minute. Turn out onto a lightly floured surface and divide dough into 12 even portions. Now you can pick your shape. For pretzel bites roll each portion into a snake then cut the snake into bite size pieces, about 1 1/2 inches in width.

Dip the pieces in the baking soda water and place on the baking sheet. Dab with a paper towel if there is an excess of water. Brush each pretzel bite with egg whites/melted butter mixture then sprinkle with kosher salt.

Bake for 7-8 minutes, or until browned.

Serve warm or at room temperature.

Yield: 3 dozen+

Review: Mmmmm, I loved these little pretzel bites. The good thing about these, they don't need to be perfectly shaped. I love the oddness of the shapes and added just enough salt to my pregnancy liking! My little cookie loves salty foods! These did make a huge batch and I shared a batch or two with my friends.
Foodie Fun Bonus: A couple weekends ago I met up with Jessica while I was in San Diego. It was really great to hang out again since the last time we saw each other was the FoodBuzz conference in SF. We ate some yummy tacos, split a peanut butter sundae at Ghiraradelli and talked endless foodie gossip. It was really great to see her one last time before she departs to China. I really love the foodie support that our food blogging community has, and I wish her nothing but the best for her exciting journey ahead. Mostly, I'll be living vicariously through her exciting travels! Pin It

Friday, September 23, 2011

Potato Slabs

My husband, Eric, and I are really fortunate to live closeby our favorite baseball team, Los Angeles Anaheim Angels. We're almost getting down to the end of the baseball season (162 games), and we are about 5 games behind the Texas Rangers in the American League West. We have to win the remainder of the games left and Texas needs to lose the rest of them for us to take the title so we can head to playoffs. I'm crossing my fingers for my boys in red and I'll be cheering them tonight as they take on the Oakland Athletics.

One of the coolest spots at the Angel stadium to hang out prior to the game is under the "Big A." It's where all the "tail-gaters" hang out hours before the game, they get their grub cooked on their little charcoal grills, and drink a little liquid gold before heading into the game. I haven't really participated in tailgating before at the stadium, and just do the "act of tailgating" at our house. It's easier to invite friends or family to eat something at the house, fill our stomachs with yummy food, drink our free liquid gold and head over to the stadium to have a great time.

It's the economical way of "tail-gating at home" and this is one great dish that I served up. Plus, it's another fantastic "tail-gating/appetizer" recipe swap from Sarah at A Taste of Home Cooking. These potato slabs are almost like having freshly made potato chips with loaded toppings. It's easy to prepare and best served as an appetizer whenever you are entertaining a crowd of hungry baseball fans.

Let's go Angels!!!


Potato Slabs
Adapted from A Taste of Home Cooking
Printable Recipe
Ingredients:
2 russet potatoes
½ teaspoon smoked paprika
½ teaspoon garlic powder
Salt and pepper to taste
⅓ cup monterey cheese
5 slices of bacon, cooked and diced
Garnishment:
1 to 2 green onions, sliced thinly, white and green parts
½ cup sour cream

Preparation:

Preheat oven to 375 degrees.

Wipe potatoes with a damp dish cloth. Using a mandoline slicer or sharp knife, slice the potatoes into ¼ inch slices.

Place potatoes on a large jelly roll baking sheet and season with garlic powder, smoked paprika, salt and pepper on both sides. Drizzle one to two tablespoons of olive oil over the potatoes.

Bake for 25 to 30 minutes. Flip potatoes over and bake for an additional 15 minutes.

Remove pan from oven and place a pinch of cheese and bacon on top of each potato slab. Return the pan to the oven and cook until cheese is melted and bubbly, about 5 to 10 minutes.

Garnish with green onions and sour cream.

Yield: 12 to 16 slices, depending on size of potatoes


Review: A very tasty appetizer like having freshly made potato chips.

Wednesday, September 14, 2011

Sargento Cheese Party

I love cheese.

Sometimes, okay not really – but all of the time I will check out the cheese displays at the grocery store and buy a couple blocks or bags to enjoy just for the heck of it. Fresh mozzarella, extra-sharp cheddar cheese, creamy brie with cranberries, or a fancy honey gouda truffle cheese which can all be found in my cheese drawer. I eat cheese like it’s my business.

Cheese is one of my favorite and easiest snacks to enjoy. So when the Foodbuzz Tastemaker program offered to let me sample and compare Sargento Cheeses to processed cheese. I did a happy cheese dance and jumped at the cheesy opportunity.

Sept 2011

I wanted extra special cheeses to indulge on because I love playing them up with my sides: fancy pita-style crackers, a dipping pesto sauce, the last of my grape tomatoes from the garden and some sliced green apples. I had bought Sargento Natural slices of Colby Jack and Muenster Cheese and my comparable - processed cheese. Is that like that the stuff in a can? No, it’s the one with a plastic wrapper. I bought the store’s generic version to avoid pointing fingers at any particular name brand. Sargento Cheese (2)

Overall, tastings of Sargento cheese versus processed cheese – there is a clear winner. Natural is always better for you because it tastes better with that aged to perfection, and texture of cheese. The processed cheese had this glossy film when removed from packaging. I will admit that I use processed cheeses whenever I make the occasional breakfast sandwich or grilled cheese, but it’s not a favorite of mine to use because it’s lack of flavor. I love the low price of processed cheese, but it’s lack of texture and flavor that always deters me to use other cheeses. If I want something with more of a bite, I would go natural and Sargento would be a nice selection if available.

The Sargento Colby Jack & Muenster cheese slices would be perfect in a grilled cheese or for your next cheese plate. Also, it would be great on top of burgers or in a breakfast sandwich. I know cost is always a factor when deciding on which cheese to indulge, but it’s always the wiser route to go with something that is natural not processed. A little bit of healthy food doesn’t hurt you.

Disclosure: As part of the Foodbuzz Tastemaker Program a $25 gift card and these opinions are my own for Sargento cheese.

Wednesday, August 10, 2011

Mediterranean Dip

My latest food obsession with sun-dried tomatoes has been taken to another level. I have a new crack dip using sun-dried tomatoes and it’s ohmygawdshutthefrontdoorawesome. For reals. Crack dip was the coined nickname of “buffalo chicken dip” from other food bloggers/foodies and it’s made mainly during football season – it’s one of the most craved dips to make. This Mediterranean dip is buffalo dip’s new competition, crack dip’s sister.

This Mediterranean dip was inspired by a three-layer dip that I came across while tasting samples at my favorite Farmers Market, Orange Home Grown. The three layer dip was offered to me to taste with their signature pita chips and it blew my mind. It’s a simple dip of a three layers, feta cheese, pesto and sun-dried tomatoes. Simple yet amazing.

I bought a container and a couple other things and shamefully… we went through the small 6 ounce container in a day. There was no way my impatient self would wait another week to get my hands on another one. Naturally, I made my own version to satisfy my new crack dip need. It’s simple to prepare, and best shared with friends, family, and loved ones with a big bag of pita chips.

Disclosure: Crack dip’s sister is addicting.

Mediterrean Dip

Mediterranean Dip
Inspired from
Baba Foods:
Printable Recipe
Ingredients:
12 ounces feta cheese, crumbled
¾ cup pesto
1 cup
sun-dried tomato pesto
¼ cup sun-dried tomatoes in oil
½ cup artichokes, chopped and quartered finely
Extra-Virgin Olive oil
Salt & Pepper
Pita chips for dipping


Preparation:


Preheat the oven to 350 degrees.


Add a tablespoon of extra-virgin olive oil to the bottom of the serving platter. Add 6 ounces of feta cheese crumbled. Add the pesto on top. Add the sun-dried tomato pesto on top. Sprinkle the chopped artichokes and sun-dried tomatoes in oil over the dip. Add the rest of the feta cheese on top.


Bake in the oven for 10 minutes. Season with salt and pepper.


Serve immediately with pita chips. Try really hard to not eat the entire bowl.

Mediterrean Dip 2

Review: Only if we had taste vision through the computers, would you be able to quickly enjoy this wonderful dip. Make some today – it’s cheesy, tangy and nom-alicious! (Do you like my crackle nail polish? It’s another thing I’m addicted to, it’s so much fun!)

Tuesday, August 9, 2011

Stuffed Mushrooms with Sun-Dried Tomato Pesto

My latest food obsession is sun-dried tomatoes. I can guarantee it’s a product that I have been buying for the past couple of weeks. I have been in love with the tangy bite it brings to any dish. I find myself instantly drawn to recipes that feature sun-dried tomatoes, or adding them to recipes, too. I loved the slight hint of them in one of my favorite appetizers – caprese on a stick. Or adding them to my Duo Tomato pasta, it intensifies that buttery and roasted sweetness of the tomatoes to another level. 

This appetizer was a no-brainer to prepare, and I found myself enjoying them as soon as they were out of the oven. With one quick bite, you taste the ooey gooey Fontina cheese paired with the savory sun-dried tomato pesto and the crunchy bits of panko – it’s melt in your mouth tasty. You might find yourself stuffing your face with them all night long. These stuffed mushrooms are bursting with flavor and a great addition to any meal, party or just because you love sun-dried tomatoes.

Mmmm-mmm!

Stuffed Mushrooms with Sun-Dried Pesto

Stuffed Mushrooms with Sun-Dried Tomatoes
Printable Recipe
Adapted from Gimme Some Oven
Ingredients:
Stuffed Mushrooms:
8 ounces button mushrooms
¼ cup sun-dried tomato pesto
¼ cup Panko breadcrumbs
½ cup Fontina cheese


Sun-Dried Tomato Pesto
1 (24 ounce) jar of sun-dried tomatoes in oil
6 cloves garlic, peeled (or about 3 tsp. minced)
½ cup walnuts
½ cup pine nuts
¼ cup fresh sage leaves
¼ cup fresh basil leaves
8 ounces Parmesan cheese, grated
1 cup olive oil
salt and pepper to taste


Preparation:

Prep the Sun-Dried Tomato Pesto:
Place the sun-dried tomatoes, garlic, walnuts, pine nuts, basil, sage, and Parmesan in a food processor, and pulse until blended. Slowly stream in the olive oil, then season to taste with salt and pepper. Use pesto immediately, or refrigerate for up to one week, or freeze.


To Make The Stuffed Mushrooms:


Preheat oven to 350 degrees.


Carefully remove and discard the stems of the mushrooms, then clean with a damp towel. Spoon a teaspoon or so of the sun-dried pesto in the mushroom hole. Top with Fontina cheese and add a pinch of panko bread crumbs.


Bake for about 15 minutes, until the cheeses has melted and filling is warm. Serve immediately.

Review: Simply delicious, and anything with cheese and sun-dried tomato pesto is a double win dish for me!

Wednesday, June 29, 2011

Creamy Deviled Eggs

I’m a little egg-crazed because it’s another egg-cellent food post.

Deviled eggs are the perfect party appetizer because they are a perfect bite of savory food, look gorgeous on a boring serving platter and can be made in a hour. They always seem to be around on the table for the holidays especially Easter. They are simple enough to prepare and inexpensive to buy. (Cheap and tasty eats are always a win-win right?) The premise – hard boiled eggs and mashed egg yolks with a couple of basic pantry ingredients to make a tasty appetizer. Truthfully, deviled eggs are something that I have never actually prepared either so I was eager to try them out.

We were celebrating Father’s Day with my husband’s family, and I had offered to make one of the requested menu items to help my cousin out. She was busy cooking everything that her father (my uncle) had specifically selected for his special day: bruschetta, shrimp fettuccine and yellow cake - what a great daughter (my cousin)!!! I saved my cousin an hour of food prep and knew that they would love this creamy version. I love the addition of the Worcestershire and sriracha for that extra rich and spicy bite. If you find yourself watching calories, or do not like mayonnaise – you can easily substitute plain Greek yogurt like Novice Chef’s version, too.

Delicious and easy peasy.

Creamy Deviled Eggs 2

Creamy Deviled Eggs
Adapted from Food Network Magazine - April 2011
Printable Recipe
Ingredients:
8 hard-boiled eggs
3 tablespoons mayonnaise
1 teaspoon mustard
1 teaspoon Worcestershire sauce
1 teaspoon red wine vinegar
¼ teaspoon paprika
juice of ½ lemon
a touch of Sriracha
2 to 3 green onions, thinly sliced
Kosher salt & pepper


Preparation:


Prepare the eggs: Place the eggs in a saucepan with add water until they are covered by at least 1 inch. Bring the water to a boil over high heat. Remove the pot from heat, cover and let sit for 10 to 12 minutes. Drain the hot water, add cold water, and let cool completely.


Lightly tap the eggs on the counter, and slowly peel the eggs under running water. The icky gray skin should be removed, and place in a bowl. Repeat until all eggs are peeled. Carefully slice the eggs in half and remove the egg yolk by adding a little pressure to squeeze them out and pop them in a medium bowl. Place the egg whites on your serving platter.


Combine the mayonnaise, mustard, Worcestershire sauce, red wine vinegar, paprika, lemon, and sriracha with the egg yolks. Whisk to combine and mix until slightly fluffy, and taste for seasonings. Add salt and pepper if needed.


Place the egg mixture into a piping bag with a large tip or use a plastic sandwich bag with the tip of the corner snipped.


Pipe the mixture into the holes of the egg whites. Lightly dust the tops with paprika and garnish with sliced green onions.


Enjoy!

Creamy Deviled Eggs

Review: Creamy and tangy and absolutely gorgeous. They remind of 80s Tupperware potluck parties because it’s never a party without your typical appetizers. My only problem with deviled eggs - the cooked egg lingering smell. Eggs are good for you, but why do they need to smell so bad? Please help me.

Monday, June 20, 2011

Caprese on a Stick

Recently one of my favorite photographers, Matt Armendariz, came out with a cookbook. I freaking love his blog, his photographs inspire and motivate me, and he’s the coolest guy in the LBC. So when I found out “On a Stick!” was his beloved first book, I knew that I had to have my very own copy. I first caught a glimpse at the book when I attended Matt’s photography workshop a couple months ago, and I have been waiting patiently for my own copy.

Everyone knows that I love to entertain and host parties, and there were countless recipes that I had seen that I had been dying to make – everything from appetizers, drinks, sweet and savory things on a stick. It’s the typical and quirky things that you love on a stick or you should put on a stick because it’s so much easier to eat. Everything from the typical corndog, chicken and waffles (Roscoes’ fans), sangria on a stick and caprese on a stick. I fell in love with this recipe instantly because it was a sweet reminder of my recent Italian vacation. Plus, it was so simple and easy to put together when attending or throwing a potluck or summer party.

Get your copy today, and have fun eating your food on a stick.
Caprese
Caprese on a Stick
Adapted from On a Stick
Printable Recipe
Ingredients:
Skewers
1 container of mozzarella balls
a handful of basil leaves
1 pint of grape or cherry tomatoes
1/2 cup sun-dried tomatoes
kosher salt
Olive Oil
20 to 24 skewers about 6 to 8 inches long

Preparation:

Alternate grape tomatoes, mozzarella balls, sun-dried tomatoes and basil leaves on small bamboo skewers. Sprinkle with salt and pepper.

When ready to serve, garnish with a drizzle of olive oil and kosher salt.
Caprese 2
Review: Simple, easy and delicious.
I was sent a free copy of On A Stick! from the publisher to review. I received no compensation and the opinions expressed are my own.

Wednesday, April 6, 2011

Baked Fontina

I absolutely love cheese and I would eat it all day if I could. I would love to live the life of a cheese monger because you would eat cheese and get paid to do it, too! I saw an email about a cheese class being offered at a local brewery to learn more about the wonderful world of cheese and without hesitation I signed up for the cheese class. (Drool!) Dairy would be my ultimate source of calories for the day. It wouldn’t be a problem right? There is nothing as comforting as a piece of creamy, velvety, soft, semi-soft, hard, blue or stinky cheese that brings me to my own cheesy haven.

I nearly melted into pieces when I saw this recipe on Barefoot Contessa, and instantly drooled over this baked fontina dip. I had secretly planned a wine and cheese party in my head for my friends, and I. But I accidently forgot to invite everyone over because I wanted this sucker all to myself. I wanted to test the recipe before sharing it with others. This recipe is ridiculously easy, and the only difficult task you will find is not having enough when you share it with your guests. It’s rich, creamy and indulgent for your next gathering. I promise I’ll invite my friends and family over for this dish!

Recognize the rind!

Baked Fontina

Baked Fontina
Adapted from How Easy is That
Printable Recipe
Ingredients:
1 ½ pound Italian Fontina Val d’Aosta cheese, rind removed and 1-inch diced
¼ cup good olive oil
6 garlic cloves, thinly sliced
1 tablespoon fresh thyme leaves, minced
1 teaspoon fresh rosemary leaves, minced
1 teaspoon kosher salt
1 teaspoon freshly ground black pepper
1 crusty French baguette or sourdough


Preparation:


Preheat the broiler for 5 minutes and place the oven rack on the top section.


In a cast iron pan, add the cubes of Fontina evenly in the pan. Drizzle the olive oil over the cheese. In a small bowl, mix together the garlic, thyme, and rosemary and sprinkle mixture over the cheese.


Season with salt and pepper and place under the broiler for 6 minutes, until the cheese has melted and bubbly.


Serve with crusty chunks of bread alongside the baked Fontina right out of the oven. Dip and enjoy!


Fontina Dip2

Review: You can substitute apple slices, carrots, celery, and vegetables to use instead of bread. Gruyere or gouda is another great melting cheese that you can easily substitute, too. This baked fontina is soooo gooey and delicious, you’ll be dipping for more! All you’re missing is a glass of wine. Winking smile

Wednesday, January 26, 2011

Hot Wings with Blue Cheese Yogurt Sauce

NFL playoffs this past weekend had my husband and I hankering for some tasty football food. My husband, Eric, is both a Bears and Packers fan, so he was quite happy regardless of the outcome but his dad has been a fanatic of the Steelers. (Superbowl should be interesting!)  We had some typical snacks of homemade guacamole, chips, pizza and to end the night I wanted the ever so popular – hot wings. I had bookmarked Bobby Flay's losing dish from his Wings Throwdown and thought it would be perfect food to enjoy after the games. We had invited a couple of friends over to watch the game with us, and act as my taste testers for this new dish, too. Besides, it had been awhile for me to cook up a Bobby Flay recipe…getting my cook on always puts me in wonderful spirits. It’s like tackling a beast in the kitchen whenever I cook a Bobby Flay recipe, can I, or can’t I?

Thankfully my local Costco carries the gigantic package of wings and I bought 7 pounds of wings for less than $11. I’m not too familiar with preparing hot wings because it’s something we usually order at the restaurants, but looking over this recipe - these hot wings were easy enough to prepare. The only problem that I had encountered was cutting the wings and removing the tips, I had a hard time splitting the bone in the right spot. Actually I got frustrated with the amount that I had to cut up and just cut the tips off and didn’t bother to remove split them. (Take the time and do this step, you’ll save time in the fryer and eating-wise – you can hold them easier.) These were absolutely terrific, the hot wings were crispy-crackly and did not get soggy from the honey chile butter sauce. The fiery heat from the ancho chile and chipotle peppers adds character and is balanced out from the cooling chunky blue cheese yogurt sauce...it’s one hot mess of wings that you will be enjoying!Hot Wings with Blue Cheese Yogurt Sauce2

Hot Wings with Blue-Cheese Yogurt Sauce

Adapted from Bobby Flay's Throwdown

Printable Recipe

Ingredients:

  • Canola oil
  • 3 pounds of chicken wings split at the joint (wing tips removed and discarded)
  • 2 cups all-purpose flour
  • kosher salt and freshly ground black pepper
  • 3 tablespoons ancho chile powder, divided
  • 1 1/2 teaspoons garlic powder
  • 1/2 cup red wine vinegar
  • 1 tablespoon balsamic vinegar
  • 2 tablespoons pureed chipotle chile in adobo
  • 2 tablespoons chile de arbol powder
  • 1 heaping tablespoon Dijon mustard
  • 1 to 2 tablespoons honey
  • 1 stick unsalted butter
  • 3 tablespoons finely chopped fresh cilantro leaves
  • Celery sticks

Blue Cheese Yogurt Sauce:

  • 1 1/4 cups Greek yogurt
  • 1/2 cup crumbled blue cheese (recommended: Cabrales)
  • 1 tablespoon sour cream
  • 2 tablespoons finely grated red onion
  • 2 tablespoons finely chopped fresh cilantro leaves
  • kosher salt and freshly ground black pepper

Prepare the blue cheese dipping sauce. In a small bowl, stir together the yogurt, blue cheese, red onion, cilantro and salt and pepper. Refrigerate for at least 30 minutes before serving to allow the flavors to meld.

For the Hot Wings:

In a large deep pot or deep fryer, heat 2-inches of the oil until it reaches 365 degrees.

In a medium bowl, stir together the flour, 2 teaspoons salt, 1 teaspoon pepper, 1 tablespoon ancho chile powder, and garlic powder until fully combined. Season the wings with salt and pepper and cover the wings with the flour in batches. Lightly coat and remove any excess flour.

Cook the wings in batches and cook until golden brown and cooked through, about 8 to 10 minutes. Remove and place on a plate lined with paper towels. Place the cooked wings on a serving platter.

In a small bowl, whisk together the vinegar, pureed chipotle chile, remaining 2 tablespoons of ancho chile powder, chile de arbol powder, and mustard until combined.

In a medium saucepan over medium-high heat, melt the butter. Add the vinegar mixture and bring to a simmer. Season with salt, pepper and honey to taste.

Drizzle the honey-chile butter mixture over the cooked wings. Garnish with chopped cilantro and serve with blue cheese yogurt sauce.

Enjoy!

Hot Wings with Blue Cheese Yogurt Sauce

Review: We absolutely love these chicken wings, and couldn’t believe Bobby Flay had lost the Throwdown with this recipe. My friends and I loved the crispy chicken drizzled with the honey chile butter sauce, it gave a fiery tang with each bite and the blue cheese yogurt sauce paired perfectly. It was a great dipping sauce because it was chunky and stuck onto the wings as you dipped into it. I’ll have to prepare Drew Cerza’s winning recipe for our upcoming Superbowl party to compare the dishes. I think my lips are still on fire from eating these hot wings!

Tuesday, January 4, 2011

Cheese-stuffed Dates with Prosciutto

I'm a little late on posting this, but forgive me because I'm catching up on some of the yummy recipes that I made prior to my NY resolutions. It's not low carb worthy, but definitely a tasty treat and low on calories if you eat a couple of them. I fell in love with the simplicity of flavors and how quick and easy it was to prepare. Time is a precious commodity so you can thank me for sharing a simple recipe. These are a perfect blend of salty and sweet that might make you squeal in excitement. (I sure did enjoy a couple but with the practice of everything in moderation because there is no need to deprive yourself of foods that you love, too.)

For New Year's Eve, my husband and I partied on down at our best friend's new house. I was very thankful to be ringing in the New Year with our wonderful friends because they are our second family when we can't be with our own families at times. My girlfriend, Monica, had told me to bring some veggies to accompany some of her tasty dips but as you may know I couldn't help but bring something else to bring for everyone to enjoy. Besides, I was also looking for a quick way to use up the mascarpone cheese that I bought for a cheesecake that I never got around to making but you can always substitute regular cream cheese instead of mascarpone cheese. They are essentially almost the same ingredient, but mascarpone has a slight creamier texture. Make this for your next party!
Cheese-Stuffed Dates with Prosciutto
Adapted from Giada DeLaurentis
Printable Link
Ingredients:
1/2 cup mascarpone cheese, room temperature (Substitute cream cheese)
1 tablespoon fresh thyme, chopped
16 Medjool dates, pitted and split in half
12 slices of prosciutto, cut in half
Kosher salt and freshly ground black pepper
16 toothpicks or cocktails picks

 
Preparation:
 
In a small bowl, mix together the mascarpone cheese and thyme. Season to taste with salt and pepper.

Carefully split the medjool dates in half and remove and discard the pits. Spoon about 1 heaping teaspoon into the dates and wrap a piece of prosciutto around it and secure it with a toothpick.

Arrange on a platter and enjoy!

Yield: 4 to 6 servings

For 3 Dates - Calories: 194; Carbs: 22; Sugar: 21; Protein: 6; Sodium: 423; Fat: 10
Review: I doubled the recipe and I had more dates leftover than I had prosciutto. Some of the dates were doubled up, but next time I'll have to buy extra prosciutto.I think some of my friends were quite surprised by my appetizer, and they told me that it tasted very yummy and delicious. One of my friends instantly knew what they were and immediately started gobbling them up. Alex had told me that he had it before and it was one of the best treats that he has enjoyed.

Wednesday, December 22, 2010

Bocaditos

Whenever I'm entertaining for dinner parties or get togethers, I always make sure there is plenty of tasty appetizers to pass. Sometimes I'll go with something simple like chips and guacamole or my tasty buffalo chicken dip. If I ever have plenty of time to prep something tasty - I love making these caramelized onions with goat cheese thyme tarts. Or I'll pick up some an assortment of cheeses with salami and prosciutto. However, I love prepping pasta de bocaditos because they are easy to prepare and addicting to eat. Once you start eating one, you can't stop and keep going and going until there is no more.

Pasta de bocaditos is a sandwich spread composed of ham, pimentos, cream cheese, mayonnaise, and sweet relish. Well, anything prepared with cream cheese usually wins me over. Pimentos or roasted red bell peppers is what gives the vivid reddish-pink coloring and don't let it alarm you - it tastes absolutely delicious.  My Cuban mother-in-law had taught me the original recipe but my cousin told me the "boozied" version requires cognac in it, too. It gives a little subtle tang of flavor to the sandwich spread and takes it to another level. Bocaditos are wonderful little finger sandwiches, and perfect appetizers for any party. Make some boozy or non-boozy bocaditos today!

Bocaditos (small sandwiches)
Adapted from my mother-in-law and cousin, Veronica
Ingredients
Printable Recipe
1 - 8 ounce bar of cream cheese, room temperature
4 ounces of pimentos
1/2 cup mayonnaise
2 cups of ham (I use sandwich sliced ham)
2 tablespoons of sweet relish
1 tablespoon of cognac or brandy
24 Sweet Hawaiian bread rolls

Preparation

In a food processor or blender, combine all the ingredients and pulse until fully combined. Spread about a tablespoon or more as a filling for the bread rolls. Place the remaining spread in a serving bowl.

Variation - You can use white sandwich bread with the crusts removed and cut on the diagonal or soda crackers as another option.

Review: Such an easy appetizer to prepare at a moment's notice, and it's always delicious. Boozy food will always make your guests be asking for more and that's never a problem right?

Monday, October 11, 2010

Bacon-and-Tomato Guacamole & Cookbook Winner

Holy guacamole....this is one of the best guacamole's that I have tasted in my life. In.my.ENTIRE.LIFE. 
Bacon and guacamole together at last, it's like the clouds parted and angels were singing hallelujah. This tasty dip has been bacon-ifed by Rick Bayless and I can't thank him enough for creating a masterpiece. If you are a diehard bacon-lover, this is one dip that will make you fall to your knees. This is another tasty sample that I enjoyed while we were at the Rick Bayless cooking demo and I had to share the wonderful recipe.

I never figured Rick Bayless to be the type of chef that makes everything better with bacon, it doesn't seem his style. But you know what...I love this creation. The crispy and crunchy bacon bits add an unique twist to the traditional guacamole. The smokiness of the bacon is intensified by the addition of chipotle chiles in adobo. It's smoky meets spicy combined with the butterness of avocados...it's perfection. Each bite is like a party in your mouth. It's explosive! It's madly addictive and you will be making pints of it for your next football party. Rick Bayless you da' man, the bacon man!

Bacon-and-Tomato Guacamole
Adapted from Fiesta at Ricks
Ingredients:
5 strips medium-thick bacon
3 medium-large ripe avocados
½ medium white onion, chopped finely
2 or 3 canned chipotle chiles en adobo to taste, removed from the canning sauce, stemmed, slit open, seeds scraped and finely chopped
1/4 cup fresh cilantro, coarsely chopped
Salt & Pepper
1 to 2 tablespoons fresh lime juice


Preparation:


In a large skilled over medium heat, cook the slices of bacon until crispy and browned. Drain on a plate lined with paper towels, and coarsely crumble.


Cut around the avocados, scoop out the flesh and remove the pit and discard. Place the avocado into a large bowl. Using an old-fashioned potato masher or fork, mash the avocados coarsely. Sprinkle a pinch of salt.


Place the diced onions into a small strainer or colander and rinse under cold water. Shake off the excess water and transfer to the avocado bowl. Add the remaining ingredients - chipotle chiles, tomatoes, cilantro and a handful of the bacon. Gently stir to combine. Taste and season with additional salt. Add additional lime juice if needed.

Garnish with additional bacon and chopped fresh cilantro. Serve with tortilla chips.
Review: Oh.em.gee. I love bacon, it's like meat candy. And mixing it up with one of my most favorite dips. Bacon + guacamole = Happy days. I highly recommend you trying this recipe out at your next party, your guests will fall in love with you. Thank you Rick Bayless, this recipe has two big thumbs up!
The winner of the autographed copy of Fiesta at Ricks by Rick Bayless is lucky #38- toridanielle -a fellow What's Cooking and April 2008 nestie!! She entered the giveaway twice (1st entry and 38 entry) and her fave dish to entertain is a pear tart with creme brulee custard. That sounds absolutely sinful, you must send me the recipe! Congrats girlfriend, please make this bacon-and-tomato guacamole if you get a chance. Email me your address and I'll be shipping you this cookbook shortly. Thanks again to everyone who participated.


Pin It button on image hover