Mrs. Regueiro's Plate: Bread
Showing posts with label Bread. Show all posts

Monday, August 26, 2013

Pot of Gold: Jessica's Virtual Baby Shower

It's time for a virtual party! A virtual party is when a group of blogger friends choose a day to write a post to celebrate such a blessing in their life. It's one way to shower their friend with love and it is a special way to share the dishes that we might be enjoying if we were all together in real life. The hardest part of the virtual party is that most of us all live far away from each other but that doesn't stop us from showering our friends with love.
Today Jessica of My Baking Heart and I are co-hosting a baby shower for Jessica of Sunny Side Up. She is expecting her first baby anytime now - a sweet baby girl! As you may know if you don't already, Jessica and Jesse have named their sweet daughter, Maeve. It comes from Irish descent and Jessica absolutely loves Irish dancing. Jessica and I wanted to do a little Irish jig (if we could) to celebrate and help welcome her little bundle of joy Irish style, so we came up with the perfect theme - Pot of Gold!

Jessica is a dear friend to me who I had met a couple years ago on a cooking board and we actually met in real life at a food blogger conference and also have had a couple meet-ups afterwards as well. We have been friends ever since and I have been slowly waiting for the day for her to become a mommy. Jessica is pretty awesome with kids (she was a part-time nanny), cooks and bakes yummy and delicious foods like this incredible Tuxedo Layered Cheesecake or one of favorite meals Spicy, Sticky, Sweet Asian Meatballs and is a very thoughtful and caring friend and her down to earth charm is infectious. She is one of my all-time favorite bloggers that continues to inspire me and a true sweetheart of a friend. I know that Jessica is going to be one fantastic mommy and will shower her little pot of gold with so much love.

To celebrate Jessica's Pot of Gold baby shower, Jessica and I have gathered a fabulous group of Jessica's favorite bloggers for a virtual shower. Everyone has prepared plenty of delicious treats and mouthwatering eats for this wonderful Pot of Gold virtual baby shower.

First up, Katie of So Tasty, So Yummy baked a Chocolate Guinness Cake. Chocolate and beer in a cake? This scrumptious sweet treat is a must for any Irish celebration if you ask me. Pure genius (Guinness).
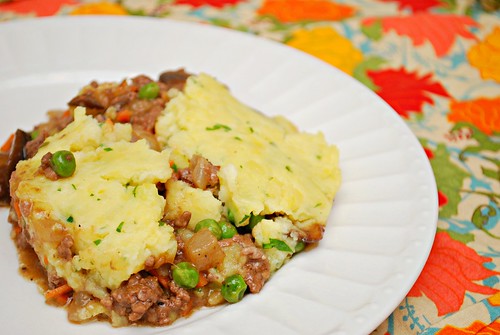
A fellow friend of ours, Joelen of What's Cooking Chicago made a tasty Shepard's Pie. This is a staple in Irish cooking and definitely a meat pie that we would all enjoy. Highly satisfying!
Next up, Amber of Sugared Whisk made these fantastic Irish Egg Rolls. These tasty and filling appetizers are a perfect alternative to the typical corned beef and cabbage. Heck yes!
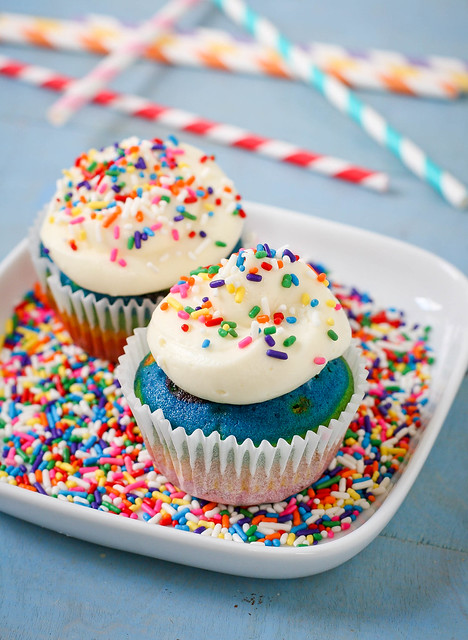
Krissy of Dainty Chef baked up these gorgeous Rainbow Cupcakes. These colorful rainbow cupcakes are perfect for this Irish celebration because they are fun to make and eat as well. It's like eating all the colors of the rainbow!
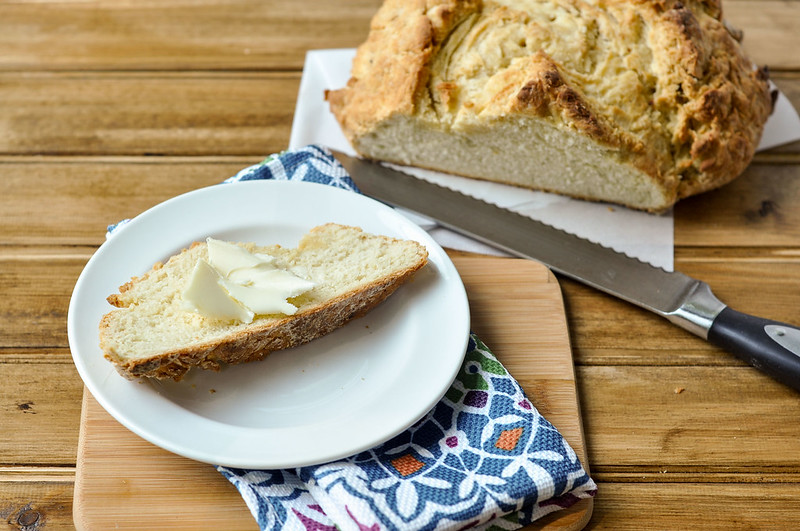
Rachel of Good Thymes and Good Food baked up one of my favorite dishes that I love to indulge on of Irish Soda Bread. This Irish classic is best when served warm with good butter, especially Irish butter if you can find it.
Kelsey of Apple a Day baked up a batch of some savory Irish Cheddar Scones. These scones are the perfect Irish indulgence - cheesy and buttery carb-y heaven. Yes please!
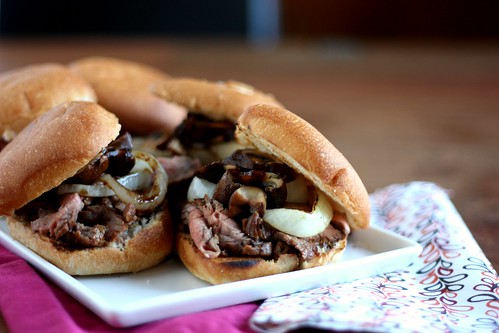
Elly of Elly Says Opa made a tray of Steak and Guinness Sandwiches. This fancypants steak sandwich is a beautiful marriage of beef and Guinness. Can I have a tray of these right now?
Nikki of Seeded at the Table made this gorgeous End of the Rainbow Fruit Salad. This End of the Rainbow Fruit Salad is the first book in a series of kids cooking-related books from the Kitchen Club kids. Kid-friendly recipes are a must for any future baby foodie! Smart thinking mommy Nikki!
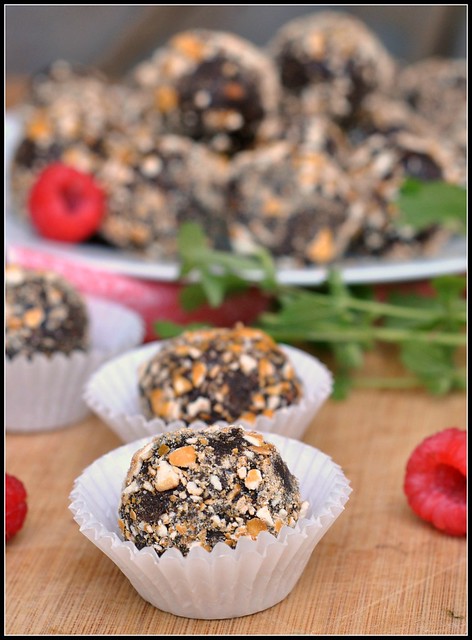
Another mutual friend of ours, Nicole of Prevention RD, made these irresistible Guinness and Pretzel Truffles. I have to get my hands on some Guinness and try these suckers out because they sound ahhh-mazing!

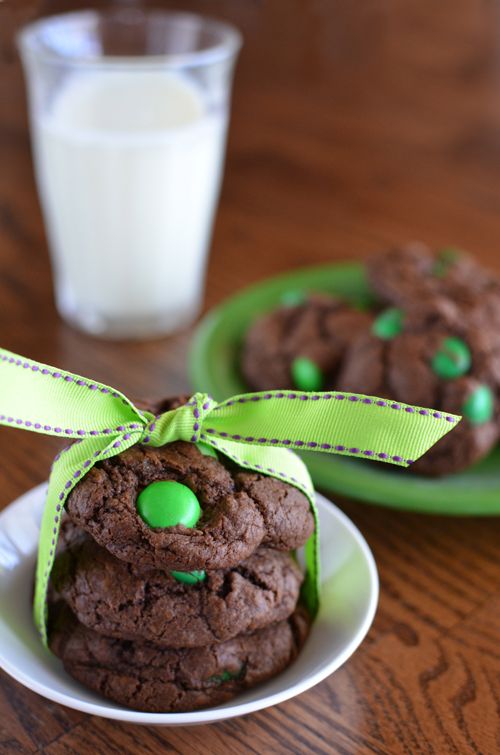
Jessica my fellow co-host of My Baking Heart made Chocolate Mint M&M Cookies. Jessica must have been on the same cooking mindset as myself because I used Mint M&Ms in my recipe as well. Any M&M cookie is a winner but this Chocolate Mint version will have you addicted!
Finally, for my own contribution, something that every pregnant woman wants/needs/must-haves are the perfect icy cold sweet treat - Shamrock Ice Cream. You always need to wear green for St. Patrick's Day to avoid getting pinched and I wanted to make something that was green enough to eat! I was inspired from Suzanne to make a batch of Shamrock Ice Cream. It's funny but I have been on an ice cream making kick lately, and I'm not even pregnant! My adaptation has mint Oreos and mint M&Ms making it the ultimate minty green concoction.

Shamrock Ice Cream
Adapted from The Perfect Scoop & Inspired from Kokocooks

Yield: 1 pint
Ingredients
  • 1 cup whole milk
  • 2 cups heavy cream
  • 1/4 cup sugar
  • pinch of salt
  • 5 large egg yolks
  • 1/4 teaspoon mint extract
  • 1 cup crushed Mint Oreos
  • 1/2 cup Mint M&Ms
  • 1/8 teaspoon green coloring
Cooking Directions
  1. In a small saucepan, warm the milk, heavy cream, sugar and salt over medium heat. Bring to a slow simmer for about 10 minutes.
  2. In a medium bowl, whisk together the egg yolks. Slowly scoop 1 cup of the warmed milk liquid into the medium bowl and whisk constantly until the egg mixture has thickened slightly. Be careful to curdle the eggs with the hot milk, remove any cooked eggs if so.
  3. Stir the whisked egg mixture back into the pot and stir the mixture together with a heatproof spatula over medium heat. It will coat the spatula. Remove from heat and chill mixture thoroughly in the refrigerator.
  4. Prepare ice cream in your ice cream maker according to the manufacturer's instructions. Stir in the green coloring until the mixture is the desired shade of green. Fold in the crushed Oreos and mint M&Ms. Place in a freezer container and let it freeze for at least 4 hours before serving.
Thank you so much to Jessica my co-host and the rest of the shower contributors. It's too bad that we all live too far away and couldn't celebrate in real life because all of these dishes sound absolutely perfect. Please make sure you check out all the fabulous dishes and scrumptious treats for this adorable "Pot of Gold" virtual baby shower.

Congratulations to Jessica on your sweet Irish baby girl. Maeve is so lucky to have parents like you and Jesse! I wish you nothing but the best as you begin your journey as a family of three. The love that your sweet child will bring you and Jesse is one of the greatest gifts that you could ever ask for.

Wednesday, November 14, 2012

Pepperoni Pizza Bread Bowls

How is Thanksgiving already next week? Oh.my.goodness.

More importantly, I have my annual Friends-giving this weekend with my college PALS that I have been busy prepping for because it's the one holiday that I love spending with my second family. We plan on spending Thanksgiving with my family this year so my mom can have all 8 of her grand-kids together in one place. My three younger sisters can't stop talking about all the dishes that we all plan on making and EATING. I'm looking forward to the turkey, corn casserole and pumpkin pie!

Leading up to the holiday eating, I have been making meals that are completely satisfying and truly comfort food at it's best. Pizza are one of our favorite meals to enjoy. We have a local pizza joint that we usually order take-out, or I usually prepare a batch of my favorite thin crust pizza whenever we miss Italia.

This meal has to absolutely brilliant because it is pizza in a bread bowl. Usually you have soup in a bread bowl, but why not pizza. It's a pizza addicts dream come true. Luckily, Elena was extra happy the morning I prepared the dough and was able to finish preparing the meal hours before dinnertime. The hard part was not eating all the leftover bread tops before dinner came around. I served this with a simple arugula salad and extra pizza sauce on the side.

Pepperoni pizza bread bowls = smack-tastic.
Pepperoni Pizza Bread Bowls
Adapted from The Confections of A Foodie Bride & Pizza sauce Adapted from Taste of Home
ZipList Add Recipe
{Printable Recipe}
Ingredients:

Thursday, October 18, 2012

Pumpkin Bread (Guest Post)

This is my new favorite recipe for Pumpkin bread. I have been itching to try something new since my go-to recipe was the Starbucks Pumpkin Bread because it was utterly drool-worthy. This new recipe makes for one really good pumpkin bread but you will have to click over and check it out at Sunny Side Up. I'm guest posting for my sweet friend, Jessica, since she's super duper busy with her move from China back to sunny SoCal. I'm so happy to have my food blogger friend back stateside!

Please check out the full post and recipe for my scrumptious pumpkin bread at Sunny Side Up.
You will absolutely fall in love with this pumpkin bread, I promise!

Thursday, May 17, 2012

Apple-Cinnamon Coffeecake

Heeeeeeeellllllllllooo!!!!

I'm slowly finding my way around the kitchen again after my maternity hiatus. Since I had minor complications in labor, Elena was born via c-section. It was not my birth plan, but we did what was best for the safety of our baby. I haven't been able to cook a meal these past couple weeks until recently. My wonderful husband has been super dad: Eric has been cooking all the meals, taking care of the cleaning around the house, and even doing all the shopping. He's one awesome daddy and doing plenty of diaper duty, too. My main goal has been taking care of our sweet baby girl and getting plenty of rest while I can.
I was really excited to celebrate my first Mother's day this past weekend. We celebrated by going out to breakfast and doing some light shopping at Ikea. I had been dying for some eggs Benedict, and I finally got my fix at one of my favorite restaurants. Stupid runny eggs and the raw eggs in the hollandaise sauce aren't allowed on a pregnant woman's diet - I have been patiently waiting to indulge on my favorite foods again. From my mother's day breakfast, I was served a tasty apple cinnamon muffin that came with my meal. It was a little tart, cakey and oh so tasty. I couldn't stop thinking about it that I had to find something similar and make a batch at home. The simple flavors of apple and cinnamon are like apple pie but with a cakey touch and this is made into a coffeecake that you can't resist it.

Perfect way to start your day!
Apple-Cinnamon Coffeecake
Adapted from Life & Kitchen
Printable Recipe
Ingredients:
Cake:
1 1/2 cups all-purpose flour
1 cup granulated sugar
1 1/2 teaspoons baking powder
1 teaspoon ground cinnamon
1/2 teaspoon apple spice
1/2 teaspoon salt
3/4 cup low-fat milk
2 tablespoons butter, melted
1 teaspoon vanilla extract
1 large egg, lightly beaten
1 cup diced peeled Granny Smith apple (about 1 apple)
Cooking spray
Topping:
1/4 cup packed brown sugar
2 tablespoons all-purpose flour
1/2 teaspoon ground cinnamon
1/8 teaspoon nutmeg
2 tablespoons chilled butter, cut into small pieces
1/4 cup sliced almonds

Preparation:

Preheat oven to 350 degrees.

Combine flour and next 4 ingredients (through salt) in a large bowl, stirring with a whisk. Make a well in center of mixture.

Combine milk, melted butter, vanilla, and egg, stirring with a whisk; add to flour mixture, stirring just until moist. Fold in apple. Pour batter into a 9 or 8 inch cake pan coated with cooking spray.

To prepare streusel, combine brown sugar, 2 tablespoons flour, and 1/2 teaspoon cinnamon; cut in butter with a pastry blender or 2 knives until mixture resembles coarse meal. Then mix in the almonds. Sprinkle streusel evenly over batter.

Bake for 35 to 45 minutes or until a wooden pick inserted in center comes out clean. Cool in pan 10 minutes on a wire rack before serving. Serve immediately.

Yield: 8 servings
Review: This apple-cinnamon coffeecake was definitely a winner with me. It was sweet and moist. This was really easy to prepare and great for breakfast or snacking while I'm nursing. And how can you not be in love with this sweet little baby? She's the most beautiful baby ever, and yes I'm a little bias, but she's my sweet cookie. I love her so SOOOOO much!

Wednesday, January 25, 2012

Soft Pretzel Bites

Lately, I have been craving salty foods more than normal. I guess my pregnancy cravings are starting to really pick up and I'm trying my absolute best to stick to eating healthy, exercising and providing nutritious foods for my growing belly. Can you believe that I'm 25 weeks today? For those that are curious, Eric and I aren't finding out the gender of the baby aka cookie. We want our little blessing a surprise come May. My pregnancy cravings haven't been pickles and ice cream or anything weird, but more salty and sour.

I had recently met up with Jessica from Sunny Side Up In San Diego and she had given me some ideas on my birthday cake that I plan on baking next month. I wanted to highlight something from her blog and I fell in love with from her recipe post on soft pretzel bites and a couple other recipes, too.

It's like my pregnancy cravings were instantly honed on her soft pretzel bites. These soft pretzel bites are easy enough for the immediate cook because I have conquered my fear with yeast a couple times in the kitchen. Yeast may have won more battles (failed recipes), but this might pose a little challenge if this is your first attempt with yeast. (Make sure to give yourself some ample time to let the dough rise). Be careful because these little pretzel bites might be addicting, and you can easily make sweet ones by substituting cinnamon sugar instead of coarse salt for the topping. It's a carb lovers dream come true!

Paired beautifully with my buffalo chicken soup, or make Jessica's beer cheese dip.
Soft Pretzel Bites
Adapted from Sunny Side Up in San Diego
Printable Recipe
Ingredients:
Pretzel Dough:
4 teaspoon active dry yeast
1 teaspoon white sugar
1 1/4 cups warm water (110 degrees F/45 degrees C)
5 cups all-purpose flour
1/4 cup white sugar
1/4 cup brown sugar
1 1/2 teaspoon salt
2 Tbsp butter, melted
Topping:1/2 cup baking soda
4 cups hot water
2 egg whites
2 tablespoon butter, melted and cooled
Coarse kosher salt, for topping
Parchment paper and cooking spray

Preparation:

In a measuring cup, dissolve the yeast and 1 teaspoon sugar in warm water. Set aside. (Mixture should become foamy - or you have bad yeast or too hot water).

In the bowl of a standing mixture fitted with a dough hook, combine the flour, sugars, and salt on low speed. Turn off the mixer and pour the water/yeast mixture and melted butter into the bowl. Turn the mixer on and knead for 6 to 8 minutes until the dough is smooth. If the dough is too dry you can add extra water, a tablespoon at a time.

Lightly oil a large bowl. Remove the dough from the mixer and shape into a ball. Place the dough ball in the bowl, cover with a clean towel, and allow to rise for one hour (or until double in size).
Note:*I turn on my oven at the lowest temp at 200 while I am doing my food prep. Then I place the bowl in the oven, and turn off the oven with the door slightly open for 30 minutes, then remove it and place on top of the oven for the remainder of the rising time.*

Towards the end of rising time, preheat oven to 450 degrees and prepare baking sheets with parchment paper and cooking spray. In a large bowl, combine the hot water and baking soda. In a small bowl, whisk together the egg whites and melted butter.

After the dough has risen, punch down the dough and then knead with hands for one minute. Turn out onto a lightly floured surface and divide dough into 12 even portions. Now you can pick your shape. For pretzel bites roll each portion into a snake then cut the snake into bite size pieces, about 1 1/2 inches in width.

Dip the pieces in the baking soda water and place on the baking sheet. Dab with a paper towel if there is an excess of water. Brush each pretzel bite with egg whites/melted butter mixture then sprinkle with kosher salt.

Bake for 7-8 minutes, or until browned.

Serve warm or at room temperature.

Yield: 3 dozen+

Review: Mmmmm, I loved these little pretzel bites. The good thing about these, they don't need to be perfectly shaped. I love the oddness of the shapes and added just enough salt to my pregnancy liking! My little cookie loves salty foods! These did make a huge batch and I shared a batch or two with my friends.
Foodie Fun Bonus: A couple weekends ago I met up with Jessica while I was in San Diego. It was really great to hang out again since the last time we saw each other was the FoodBuzz conference in SF. We ate some yummy tacos, split a peanut butter sundae at Ghiraradelli and talked endless foodie gossip. It was really great to see her one last time before she departs to China. I really love the foodie support that our food blogging community has, and I wish her nothing but the best for her exciting journey ahead. Mostly, I'll be living vicariously through her exciting travels! Pin It

Friday, November 11, 2011

Creamed Corn Skillet Cornbread

11.11.11

That's a pretty cool date. Someone might be getting married today. Or someone might be celebrating a birthday. It might even be someone's lucky day, or better yet our lucky day. I'm totally calling it. We should play some lotto, or jump on the next plane to Las Vegas. I have a girlfriend headed their this weekend, and she'll probably have lady luck on her side. Win some big money Elisa!!

If by chance you are like me, you are busting out all your Thanksgiving magazines and combing over recipes to prepare for the big turkey day. Thanksgiving will be here before we know it. I'm already on the turkey day countdown! I'm very thankful to celebrate the big feast twice. PALS-giving with my group of college friends and Thanksgiving with the family. Oh how I love Thanksgiving, and anytime that I get to sneak in more turkey and pumpkin pie - I'm all about it. It's the absolutely the best holiday (eating day) of the year.

One of my many favorite side dishes to enjoy is cornbread stuffing. I like making my own batch of cornbread a couple days before and adding it to the mix. Typically, I have cheated and used a box corn mix with a couple add-ins. However, I just discovered this recipe when I had a cooked a batch of my California tri-tip chili and it was absolutely heavenly. Eric and I fell head over heels over this skillet yumminess and it will be the only recipe I plan on using whenever we want cornbread and I do plan on using it when I prepare cornbread stuffing.  It's super easy to prepare and tastes oh-so delicious. It's not your typical dense cornbread but it's almost cake-like. Bonus points, no extra butter or honey is needed. Nom.

Happy lucky Friday to you all!!


Creamed Corn Skillet Cornbread
Adapted from da man - Alton Brown
Printable Recipe
Ingredients:
2 boxes of Jiffy cornbread mix or 2 1/2 cups of yellow cornmeal
1 teaspoon kosher salt
2 tablespoons brown sugar
1+ tablespoon honey
2 teaspoons baking soda
1/2 teaspoon baking powder
1 cup buttermilk
2 eggs
1 can of creamed corn
2 tablespoons unsalted butter

Preparation:

Preheat the oven to 425 degrees.

In a medium bowl, combine the jiffy cornbread, salt, brown sugar, baking powder, and baking soda. Whisk to combine.

In another medium bowl, combine the buttermilk, eggs, and creamed corn and whisk to combine. Slowly add the dry ingredients with the wet ingredients until combined.

Place a large 10 inch cast iron skillet on the stove top over medium high heat. Add the unsalted butter and melt. Pour the batter into the skillet and swirl in the honey over the batter. Place skillet in the oven.

Bake for 20 to 25 minutes, until the cornbread is golden brown and springs back upon touch.

Serve immediately. No extra butter or honey needed, only if you want it.

Yield: 8 large servings

Review: A tasty sweet cornbread that you will absolutely love. Make a double batch just in case because my husband would have eaten the entire skillet if I had let him. It's that good!!

Wednesday, April 20, 2011

Cranberry-Nut Banana Oat Bread

I have a slight problem with bananas. They always get ripe too quickly before Eric and I can enjoy them, and I rather use them for a sweet banana bread than toss them out. Who can say no to banana bread? It’s bread. It’s sweet, and healthy for you, too. My go-to recipe for banana bread is my blueberry-banana walnut bread and I wanted something a little different. I instantly found a recipe in one of my cookbooks, and put it together quite quickly.

This is recipe is similar to any banana bread recipe but with a couple additions that I always have handy – nuts and dried fruit. You can easily substitute other add-ins when you make your banana bread like chocolate chips, walnuts, raisins, or nothing at all. I like the extra texture that pecans and cranberries bring to the banana bread. It’s a sweet reminder of my favorite holiday, and a great way to start your day. Enjoy a slice with a cup of coffee or orange juice – it’s the breakfast of the champions.

Quick, easy and always delicious!

Cranberry Pecan Banana Bread

Cranberry-Nut Banana Oat Bread
Adapted from The Taste of Home Cookbook
Printable Recipe
Ingredients:
½ vegetable oil
1 cup sugar
2 eggs
½ cup pecans, toasted and chopped
½ cup dried cranberries
1 ½ cups bananas (about 3 to 4 medium)
2 cups all-purpose flour
1 cup rolled oats
1 teaspoon salt
1 teaspoon baking powder
¾ teaspoon baking soda


Preparation:


Preheat the oven to 350 degrees. Grease a 9x5 baking pan with cooking spray. Set aside.


In the bowl of the stand mixer, cream the butter and the sugar until light and fluffy. Slowly add the eggs one at a time. Add the bananas and mix to combine.


In a medium bowl, whisk together the flour, oats, salt, baking powder, and baking soda. Slowly add the dry ingredients with the wet ingredients and mix until combine. Fold in the pecans and cranberries.


Add the mix to the prepared baking pan. Bake for 60 to 65 minutes or until a toothpick inserted comes out clean. Cool for 10 minutes and transfer to a cooling rack. Slice and enjoy!

Review: Scrumptious to the last bite and the lucky taste tasters from my husband’s office got this wonderful batch of sweet bread. This made a very large loaf so I was able to cut it horizontal slices and then vertical slices – which gave me about 20 or so servings of bread, too.

Thursday, November 18, 2010

Southern Corn Bread

One more week until the best (eating) holiday of the year is here....THANKSGIVING!!!

Are you making Thanksgiving dinner this year or visiting relatives that are hosting? Most cases, some of us will be making a wonderful roasted turkey or preparing some tasty side dishes or just eating lots of good food. I do not host Thanksgiving dinner because it's my Aunt's favorite holiday day, and her bacon-wrapped turkey is soooo juicy and tender that it's hard to argue otherwise. (I'm hoping to host it someday for the family). Although, I do host a wonderful pre-Thanksgiving dinner every year with my college friends and this was the first year that I did not cook a turkey. My husband won the Iron Chef Turkey challenge from last year and I let him prepare the turkey again this year.
We have a potluck style dinner where everyone brings a side dish to pass. It was one of the biggest dinners that we had to date and had about 30 people over for dinner. It was nice to enjoy the party and talk with my guests and not run around crazy cooking up several dishes (I did some minor running around getting the side dishes warmed up but that's my cooking nature). I did prepare the stuffing and gravy as my side dishes to pass. This post will be a two-part because the first step to preparing my stuffing is making the cornbread. This southern style corn bread from Cat Cora is a perfect for stuffing because it was crumbly and not too dry and not sweet at all. Enjoy a nice chunk of this southern corn bread with honey butter or in your favorite bowl of chili or in your Thanksgiving stuffing!
Southern Corn Bread
Adapted from Cat Cora's Classics with a Twist
Ingredients:
5 tablespoons unsalted butter, plus more for the pan
3/4 cup all-purpose flour
3/4 cup yellow cornmeal
1 1/2 teaspoons baking powder
1/2 teaspoon baking soda
1/2 teaspoon kosher salt
1 cup buttermilk
2 eggs
1/2 can creamed corn

Preparation:

Preheat the oven to 425 degrees and place the cooking rack in the middle. Butter an 8x8 or 9x9 square baking pan.

In a small pan over medium heat, melt the butter. (Alternatively, melt butter in microwave on 15-second intervals). Set aside to cool.

In a large bowl, whisk together the flour, cornmeal, baking powder, baking soda and salt.

In the bowl of the KA mixer, whisk together the buttermilk, creamed corn and eggs. Add the melted butter to the mixture. Slowly incorporate the dry ingredients with the wet ingredients. Pour batter into the prepared pan.

Bake for 20 to 23 minutes or until the cornbread begins to brown. Cool for about 10 minutes prior to serve.

Enjoy!

Review: I love cornbread smothered with honey butter with a big bowl of pumpkin chili on the side or in Ree's Thanksgiving stuffing. Either way, this corn bread is easy to prepare and easy to polish off with seconds. You'll be wishing you made a double batch. Make sure to look for tomorrow's post on my Thanksgiving stuffing!

Thursday, November 4, 2010

Buttermilk Bread

Bread is one item that I purchase on a weekly basis during my grocery shopping trips. We usually buy whole-wheat or sourdough loaves depending on what we are having for the week. It's a wonderful staple food and madly addicting if you love bread like my husband and I. We love dinner rolls to accompany a hearty steak dinner, or crusty sourdough bread to dip soup in, and lately I've been in love with naan to eat with almost everything that I can think of. Bread can get expensive week after week, and sometimes we don't always finish it either.

Yet, bread is so inexpensive to make at home. It's got three essential ingredients - yeast, flour, and water and then a couple occasional fancy pantry ingredients like sugar or honey. It's really not that difficult to bake bread at home and smell of freshly baking bread is heavenly in the kitchen. Whenever we get lucky to have the cooler weather, I really love baking a batch of Whole Grain artisan loaf - it's a perfect bread batch for the week. I made this bread starter recipe to use up the leftover buttermilk that I had in the fridge and for the sweeter bread options, too. This would be a great stuffing bread with Thanksgiving around the corner or it is a great sandwich bread if you are in the mood for a panini or grilled cheese. Enjoy!

Buttermilk Bread
Adapted from Artisan Bread in Five Minutes a Day
Yield: 4 loaves of bread
Ingredients:
2 cups lukewarm water (about 100 to 110 degrees)
1 cup buttermilk
1 1/2 tablespoons granulated yeast (2 packets)
1 1/2 tablespoons sugar
6 1/2 cups unbleached all-purpose flour
Butter or neutral-tasting oil for greasing the pan

Preparation:

In a 5-quart food container, add the yeast, salt and sugar with the water and buttermilk - mix to combine.

In the bowl of the KA mixer, add the flour and yeast mixture. Knead for about 5 to 7 minutes or if you are not using a mixer, knead until completely combined and feels like an elastic band.

Add the dough back into the food container, and allow to rest at room temperature for about 2 hours until the dough rises. Cover with the lid but not airtight.

Dough can be used immediately but it is best handled when cold. Place in refrigerator until ready to bake over the next 7 days.

When ready to bake, lightly grease a 9 x 5 loaf pan. On a floured surface, cut off a 1 1/2 pound (cantaloupe-sized) piece. Add more flour if needed, and roll into a ball of dough. Carefully roll the dough around using bottom of your hands and stretching it out to an oval circle.

Add the dough into the greased pan.

Allow the dough to rest for 1 hour and 40 minutes (or 40 minutes if you are using fresh, unrefrigerated dough). Dust the top with flour and slash the top with a serrated knife. Brush the top with melted butter.

Twenty minutes before baking time, preheat the oven to 350 degrees. Bake the bread for about 45 minutes, or until golden brown.

Remove from pan and let it cool before slicing. Enjoy!
Review: The main reason why I made this bread was to make this wonderful Cinnamon-Raisin bread. Let's just say...it was awesome and soooo tasty. It was like a cinnamon roll and best bread all mixed into one. The buttermilk bread is very delicious as well, but a great starter for other possibilities. Making homemade bread has never been easier!

Wednesday, November 3, 2010

Zucchini Cake with Lime Cream Cheese Frosting

Do you ever have one of those busy days at home that you feel overwhelmed and have so much to do? That's how I feel most days after I come home to work - my schedule is pretty much the same at work (7am to 3:30pm), I'll come home and change out of my work clothes, and I'll get busy preparing dinner for the night. Most work nights, I hate preparing such a lengthy meal because it takes time away from other fun activities. Somedays when I get home, there is nothing more than I want to sit on the couch, relax and de-stress. Most often, I rather go to the gym, or shop but I love having a couple of hours to myself before my husband comes home from work.

However, as the overwhelmed housewife that I am, I have realized that cooking and baking helps me greatly de-stress. Cooking and baking gives me a sense of accomplishment, creativity and peace in making wonderful dishes and treats. After clean-up for dinner is where I love to cuddle on the couch and watch whatever is on the television but Eric was busy preparing for his big engineering test so I decided to bake up some treats. I started preparing something sweet for my office and started shredding the countless zucchini that a coworker had brought in. I had a giant baseball bat of a squash on my kitchen table for a couple weeks, and I had been wanting to make some tasty zucchini bread but decided to make this instead. It definitely was a sweet surprise, and a perfect treat for everyone to enjoy!

Zucchini Cake with Lime Cream Cheese Frosting
Adapted from Best Bites
Ingredients:
2 1/2 cups all-purpose flour
2 teaspoon baking powder
1 teaspoon baking soda
1/2 teaspoon salt
1 cup brown sugar
2 large eggs
1/2 cup butter, melted and cooled
1 teaspoon vanilla extract
1 tablespoon lime zest
1/2 cup pumpkin puree
3 to 4 cups shredded zucchini (about 4 to 5 medium)

Preparation:

Preheat an oven to 350 degrees.

Grease a 9x13 baking pan with cooking spray or butter.

In a medium bowl, whisk together flour, baking powder, baking soda, and salt.

In the bowl of the KA mixer, combine the brown sugar, eggs, melted butter, vanilla, lime zest and pumpkin puree and whisk until smooth. Slowly incorporate the flour mixture to wet mixture in three batches, and mix until fully combined. Stir in shredded zucchini.

Pour mixture evenly in the baking pan and spread out the layers with a spatula if needed.

Bake for 27 to 28 minutes or until a toothpick inserted comes out clean. Cool cake completely and garnish the cake with frosting.

Lime Cream Cheese Frosting
8-oz cream cheese, room temperature
1 1/4 cups marshmallow creme (7-oz)
1 tbsp lime zest
1 tbsp fresh lime juice
1 tsp vanilla extract

Combine all ingredients in the bowl of the stand mixer and cream together at medium-high speed until smooth and fluffy. Spread on cooled cake.
Serves 20.
Review: I loved this sweet and indulgent bread because it reminded me of carrot cake. The frosting was kinda tart and deliciously low-fat. Who knew that combining marshmallow creme and cream cheese would make such a great frosting. I loved the small addition of pumpkin puree instead of applesauce because it gave a hint of Fall flavor to the treat, too. Overall, this was a great zucchini cake and a perfect way for myself to de-stress.

Tuesday, November 2, 2010

Double Chocolate Zucchini Bread

Do you ever have one of those days where you crave something with chocolate? Something ooey-gooey sweet like chewy walnut brownies, chocolate chip cookies, brookies or perhaps maybe a good ole candy bar. Nothing seems decadent enough than a sweet treat with chocolate. Don't get me wrong but I absolutely love a beautiful slice of apple pie, but sometimes with a sweet tooth like mine - chocolate is the only cure. My coworker had mentioned to me that chocolate zucchini bread is delicious and a great way to use up the abundance of squash that I had in my kitchen.

Staying on a healthy approach I figured that vegetables and chocolate are an interesting combination, and why not enjoy a sweet dessert while getting my veggie fix in. This is a delicious, sweet, dessert bread for all chocolate lovers. This is a moist and chocolaty bread that can be used for breakfast, dessert, or snacking. You could add some walnuts or pecans for extra texture, too. Also, you could make these as muffins and decrease the cooking time. What a wonderful way to enjoy chocolate and some vegetables, too.
Double Chocolate Zucchini Bread
Adapted from Baking Bites
Ingredients:
2 cups all-purpose flour
1/2 cup unsweetened cocoa powder, sifted
1 cup sugar
2 teaspoon baking powder
1/2 teaspoon salt
2 large eggs
1/3 cup vegetable oil
3/4 cup buttermilk
1 teaspoon vanilla extract
2 medium zucchini, shredded (1 1/2 cups)
1 cup milk chocolate chips, plus extra for topping

Preparation:

Preheat oven to 350 degrees.

Grease a 9x5 loaf pan with cooking spray or butter.

In a large bowl, combine the flour, cocoa powder, sugar, baking powder, and salt. Whisk to combine.

In the bowl of the KA mixer, add the eggs, vegetable oil, buttermilk and vanilla and mix to combine. Slowly incorporate the dry ingredients to the wet ingredients until fully combined.

Add in the zucchini and chocolate chips until fully combined. Pour batter into loaf pan.

Bake for 50 to 55 minutes or until a toothpick inserted the center comes out clean. Let cool completely before slicing. Enjoy!

Review: This was a perfect cure for my chocolate fix - the bread was sweet and had just enough chocolate and you could not really taste the zucchini at all. The zucchini enhances the chocolate bread by keeping it moist. This would be a great way to trick your kiddos and adults into eating some extra vegetables, too.

Friday, October 15, 2010

Starbucks Pumpkin Bread

Hello Fall, I have missed you. Thank you for coming back. I see that sweater and scarves weather is now appropriate and the return of my chucks are apparent. Goodbye flip-flops, I will miss you, too. (But you will be back before I know it.) I can't wait for some good 'ole roasts, soups of all sorts, baked lasagnas, heck just using my oven to prepare a meal and yes of course everything with pumpkin. Pumpkin bars, pumpkin pie, pumpkin waffles, pumpkin yogurt, pumpkin spice lattes and my favorite pumpkin bread. (I'm a little bit crazy for pumpkin!)

I love that pumpkin is back in season, and I can order my pumpkin spice lattes from evil Starbucks. Of course, like the pumpkin nut that I am - I need to pair my pumpkin spice latte with pumpkin bread. It wouldn't be complete. I do not want to go broke visiting your store for this treat so I needed to figure out how to make you. It's a moist quick bread made with ripe pumpkin and a blend of fall spices. DELISH. Luckily my coworker got this recipe and shared it to me. She's quite the devoted Starbucks customer, and I was grateful for her sharing this recipe. Here's one of my favorite pumpkin spice breads for you pumpkin lovers out there.

*Starbucks Pumpkin Bread
Adapted from Starbucks
Ingredients:

1 ½ cups flour
1 teaspoon baking soda
½ teaspoon baking powder
¾ teaspoon ground cinnamon
½ teaspoon ground ginger
¼ teaspoon ground clove
¼ teaspoon ground allspice
½ teaspoon salt
4 eggs
1 cup sugar
¼ cup dark brown sugar
½ teaspoon vanilla
¾ cup canned pumpkin
¾ cup vegetable oil
¼ cup pumpkin seeds, chopped

Preparation:

Preheat oven to 350 degrees.

In a medium bowl, combine flour, baking soda, baking powder, spices, and salt and whisk to combine. Set aside.

In a large bowl, beat eggs, sugars, and vanilla on high speed for about 30 seconds. Add dry ingredients and mix. Add pumpkin and oil, mix to combine. Pour batter into a 9x5 greased loaf pan.

Bake for 60 to 70 minutes or until the top of the bread begins to brown.

When the bread is cool, slice into approximately 1 inch slices. Enjoy!

Review: Yum and yum. I love how this melts in your mouth because it's so good. The wonderful aroma of sweet pumpkin bread baking away in your kitchen brings gleeful memories to my pumpkin heart. I brought this in for my co-workers and they were all surprised it was pumpkin bread - the spices make you second guess. Buttery, spicey, and heavenly. ::drool:: Oh, how I love this sweet bread.

Thursday, September 23, 2010

Patty Pan Cranberry Bread

"Patty pan, patty pan, baker's man,
Bake me a bread as fresh as you can.
Roll it, pat it, mark it with a B,
Put it in the oven for garden and me."

Sorry, I couldn't help it and make a mash-up. (It's my inner Gleek singing.) My three year old niece loves singing this old nursery rhyme to me, and it coincidentally rhymed with Patty Pan squash. Patty pan squash is another vegetable that I have been enjoying from my coworker's over-abundance of zucchini. It seems strange enough and looks like a gigantic UFO but it is quite similar to other squash and is very mild in flavor when cooked. 

Patty pan squash in pretty interchangeable with other zucchini, so it has a milder color compared to typical green zucchini. The one similar thing to note about Patty Pan is the water content so you have to take heed to drain as much water as you can before preparing this quick bread. You will love the sweet cranberries, nutty walnuts and mild and flavorful spices combined with the patty pan zucchini....it's madly addicting.
Patty Pan Bread
Adapted from Simply Recipes
Yield: 2 loaves
Ingredients:
2 eggs
3 cups flour
3 cups patty pan (zucchini), grated
2/3 cup melted unsalted butter
1 1/3 cup sugar
1 teaspoon baking soda
1 teaspoon baking powder
½ teaspoon salt
1 teaspoon vanilla
½ teaspoon nutmeg
2 teaspoons cinnamon
1 cup dried cranberries
1 cup pecans, toasted and coarsely chopped
2 tablespoons turbinado sugar, garnishment

Preparation:
Preheat the oven to 375 degrees. Set the rack in the middle of the oven.

Spray two 9x5 loaf pans with cooking spray and set aside.

In a medium bowl, add together the dry ingredients - flour, spices, baking powder, baking soda, and salt and mix well. In the KA mixer bowl, add the sugar, eggs and vanilla extract and mix until combined. Gently fold in the shredded zucchini and melted butter to the wet ingredients.

Slowly incorporate the dry ingredients with the wet ingredients a third at a time and mix well. Fold in the dried cranberries and walnuts in the zucchini bread.
Divide batter equally into loaf pans. Garnish with 1 tablespoon turbinado sugar over both breads.
Bake for 60 minutes or until golden brown or until a toothpick inserted into the middle comes out clean. Cool in pans for 10 minutes prior to moving to cooling rack. Enjoy!

Review: Another fantastic quick bread recipe using local resources because I love cooking "green."  The spices give a beautiful rich and darker color to the bread compared to my last batch of zucchini-blueberry bread. You might almost confuse it as pumpkin bread, but this patty pan bread is sinfully delicious...and healthy.

Wednesday, September 22, 2010

Zucchini-Blueberry Bread

Gardening has been a nice relaxing hobby for me, and it's very rewarding to enjoy the fruits of your labor. It also is rewarding when you get to share your fruits with others, and I've been lucky enough to have a coworker share the wealth of his zucchini. It's one of those vegetables that I don't have the space for, and I do not want half of my garden invaded by zucchini. Luckily for me, there have been several harvests of his zucchini and I have been enjoying them in salads, stir-fries, and finally in this easy quick bread recipe.

Earlier in the month, I won a fantastic giveaway from The Novice Chef for Chobani Greek yogurt. I received a batch of Peach, Strawberry and Blueberry Greek yogurt and they all are pretty delicious and awesome all by themselves. However, I wanted to incorporate my lucky yogurt into this zucchini bread because I thought it would perk it up a bit with a blueberry touch. Blueberry yogurt and zucchini are a perfect match for each other in this quick bread. I loved how the zucchini bread turned out and it was very moist and rich-tasting. If you make additional batches it will freeze well, but I might eat them all before that happens!!!

Zucchini-Blueberry Bread
Adapted from Delish & The Way the Cookie Crumbles
Yield: 1 loaf
2 cups all-purpose flour, plus more for dusting
3 cups zucchini, grated
¾ cup sugar
½ cup pecans, chopped coarse
1 teaspoon baking soda
1 teaspoon baking powder
½ teaspoon salt
¼ cup blueberry Greek yogurt
2 large eggs, beaten lightly
1 tablespoon lemon juice
6 tablespoons butter, melted and cooled
1 tablespoon turbinado sugar, for garnishment

Preparation:
Preheat the oven to 375°F and set the middle rack in the oven. Spray a little bit of cooking spray into a  9x5 bread pan, and set aside.

In a large bowl fitted with a kitchen towel, prepare the zucchini. Shred 2 large zucchini with a box grater and place into the large bowl. Add 2 tablespoons of sugar and drain all the excess fluid.

Toast the pecans on a baking sheet for 5 minutes and allow to cool. Chop into smaller pieces.

In the KA mixer bowl, add the flour, baking soda, baking powder, and salt and slowly whisk until combined. Add the wet ingredients in a small bowl: sugar, blueberry greek yogurt, eggs, lemon juice, and melted butter and stir until combined. Set aside.

Stir the zucchini, pecans and the yogurt mixture into the flour mixture until just moistened. Scrape the batter into the prepared pan and smooth the surface with a rubber spatula. Garnish the zucchini bread with the turbinado sugar making sure to have an even coat.

Bake for 60 minutes, or until golden brown and make sure to check the doneness with a toothpick. Midway cooking time make sure to rotate the pan halfway through baking. Cool in the pan for 10 minutes before transferring to a wire rack. Enjoy!

Review: Who knew that eating vegetables would be so good? LOL. I loved the sweetness of this zucchini bread and it was a great way to use up the additional Greek yogurt and extra zucchini.  I might have to try the other yogurt flavors with the zucchini bread as well, too. Make your batch today, and I'll hopefully attempt to "freeze" a couple batches if I can! ;-)

Wednesday, August 11, 2010

Garlic Ciabetta Bread

I'm a fanatic of anything made with garlic. I absolutely love shrimp scampi from Giovanni's shrimp truck in Oahu, my wonderful creation of roasted garlic honey butter, pesto, toum, garlic french fries, and even roasted garlic ice cream (trust me, it's delicious) and the list would keep growing. I even traveled to the infamous "Gilroy Garlic Festival" up in Gilroy last summer to sample the garlic wonderfulness of it all. If the dish has garlic in it, it's a winner in my book! However, my true love affair with garlic is simply garlic bread.

In my opinion, a tasty garlic bread uses a great sourdough or Italian bread that's already wonderful to eat by itself but intensifies with the additional garlic flavors. I love when a garlic bread is rich and buttery from the olive oil or butter, and when it's all beautifully blended together to make a fantastic garlic bread. Most times I've made garlic bread, I've used Johnny's garlic spread seasoning as my go-to condiment. It's a simple and pre-made mixture and you only need butter and bread to make a fantastic garlic bread. I wanted something a little different and this recipe takes it up another level.  It's pretty fantastic and worth the hassle because it's garlicky-delicious!!! Enjoy!

Garlic Ciabetta Bread
Adapted from Barefoot Contessa's Back to Basics
Ingredients:

6 garlic cloves
1/4 cup fresh Italian parsley
2 tablespoon fresh oregano
1 teaspoon salt
½ teaspoon pepper
½ cup olive oil
1 large loaf ciabatta bread

Preparation:

Place the herbs (oregano and parsley), garlic in a food processor and mix until it is fully incorporated. Add the salt and pepper and mix again.

In a small quart pan, heat the olive oil for about 2 minutes and then add the herb-garlic mixture. Cook on low for about 3 to 5 minutes, do not let the garlic brown. Remove from heat.

Cut the bread in half and spoon the herb-garlic mixture on both sides of the bread. Place the two halves together again and wrap in aluminum foil and bake at 350 degrees for 8 minutes. Carefully remove the aluminum foil and bake for another 5 minutes. Enjoy warm!

Review: This was such an amazing garlic bread recipe - the smell of garlic and fresh herbs was drool worthy. It's my new go-to recipe whenever I'm making a batch of garlic bread.  You won't miss the premade frozen garlic bread or the typical garlic spread found at grocery stores. Delicious and tasty!

Friday, June 11, 2010

Alice's Blueberry Muffins

My husband absolutely adores blueberry muffins and I'm always baking my easy go-to recipe of banana blueberry-walnut bread. Back in my college days of working at the coffee shop days, he used to visit me at work and order his caramel latte with a blueberry muffin. He would always be sorely disappointed if we had sold out of them, and would opt for a blueberry bagel instead. So if you can imagine, his face lit up when he came home and saw that I had made blueberry muffins. It was also perfect that my girlfriend, Arminda, loves them just as much! These have a light lemon and cake texture but with the sweet bursts of the fresh blueberries. Check out Alice's Sweet Savory life blog, she's got some really great recipes there.


Alice's Blueberry Muffins
Adapted by Savory Sweet Life

Ingredients:
4 tablespoons butter, room temperature
2 tablespoons canola oil
1 cup of sugar
zest and juice of 1 lemon
2 eggs
2 teaspoon of vanilla extract
1/2 teaspoon of baking spice
1/2 cup of plain yogurt
2 cups of all-purpose flour
2 teaspoon of baking powder
1/2 teaspoon of salt
1 1/2 cups of fresh blueberries or frozen
1/4 cup turbinado sugar

Preparation:
1. Preheat oven to 350 degrees.
2. In KA mixer or medium bowl, cream butter, oil, lemon zest, and sugar for 3 minutes until combined.
3. Add eggs, yogurt, lemon juice, and vanilla beating for an additional 2 minutes. Add salt, baking powder, baking spice, and all-purpose flour gently mixing everything for an additional minute until everything is fully incorporated - about 2 minutes.
4. Gently fold in blueberries and pour batter into muffin tin lined with paper cups. About an ice cream scoop - 3/4 full. Top each muffin with a sprinkle of turbinado sugar. Bake for 30 minutes or until done. Makes about 12 regular sized muffins.

Review: Perfect way to start your day with a fresh cup of coffee. I made 6 regular sized muffins and 6 muffins tops. Eric said they look like giant blueberry cookies!
Pin It button on image hover